Showing posts with label tips. Show all posts

Monday, January 18, 2010

No-Purl Garter Stitch In-The-Round

Problem
When knitting a Shetland shawl, the center square is knitted back and forth in garter stitch. Then the border stitches are picked up around two sides of the square, thus producing the first row of a circular border. However, if you want to maintain garter stitch on the border, every other row needs to be purled. There's nothing intrinsically wrong with purling (there are even some knitters who prefer it), but for most people, purling can quickly get tiresome when the border has 1000+ stitches on each round.

Pseudo-Solutions
The alternative to purling every other round is to turn the work somewhere, somehow, and knit back, essentially knitting the border flat and using some hocus-pocus to bind the two border edges together. All of the solutions rely on a fancy wrap-and-turn on one corner...making a loose yarnover and knitting it with the next stitch; picking up the bump on one edge and knitting it with the last stitch of the row; sewing the seam when the border is completed, and so on. None of these solutions pleased me. I could always spot the turn line from a galloping horse. No good.

Fleegle's Solution

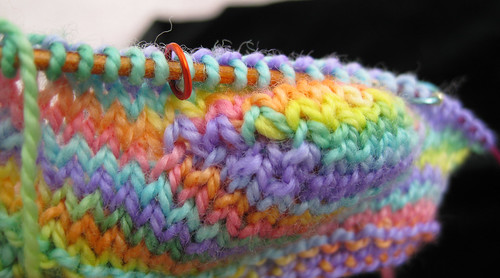
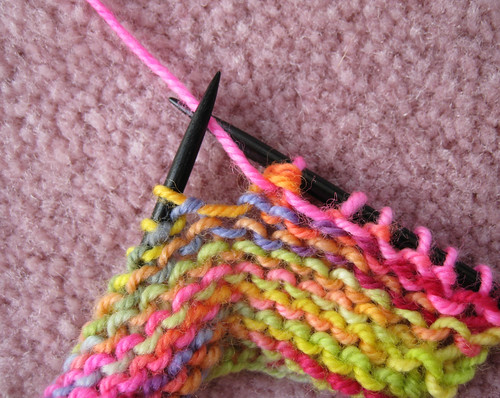
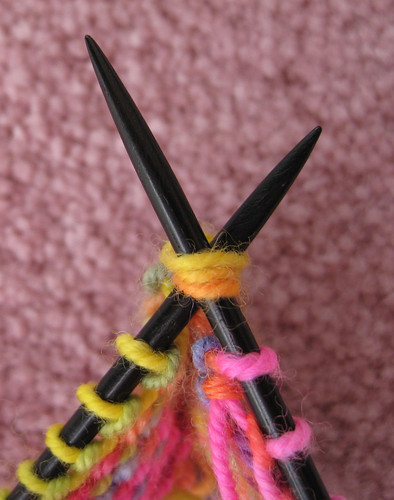
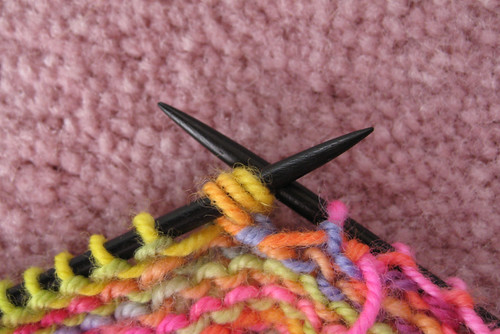
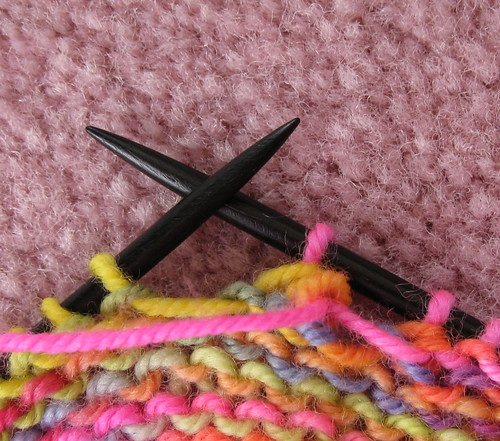
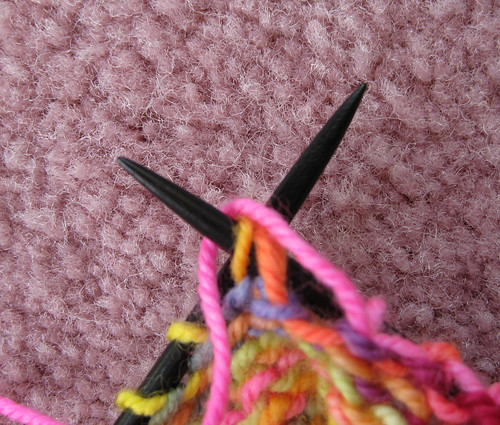
This humble-looking sample  represents a solution to a dilemma that has plagued knitters since the first dinosaur broke two limbs off a tree, wound some vines into a ball, and produced the world's first Stegosaurus shawl.
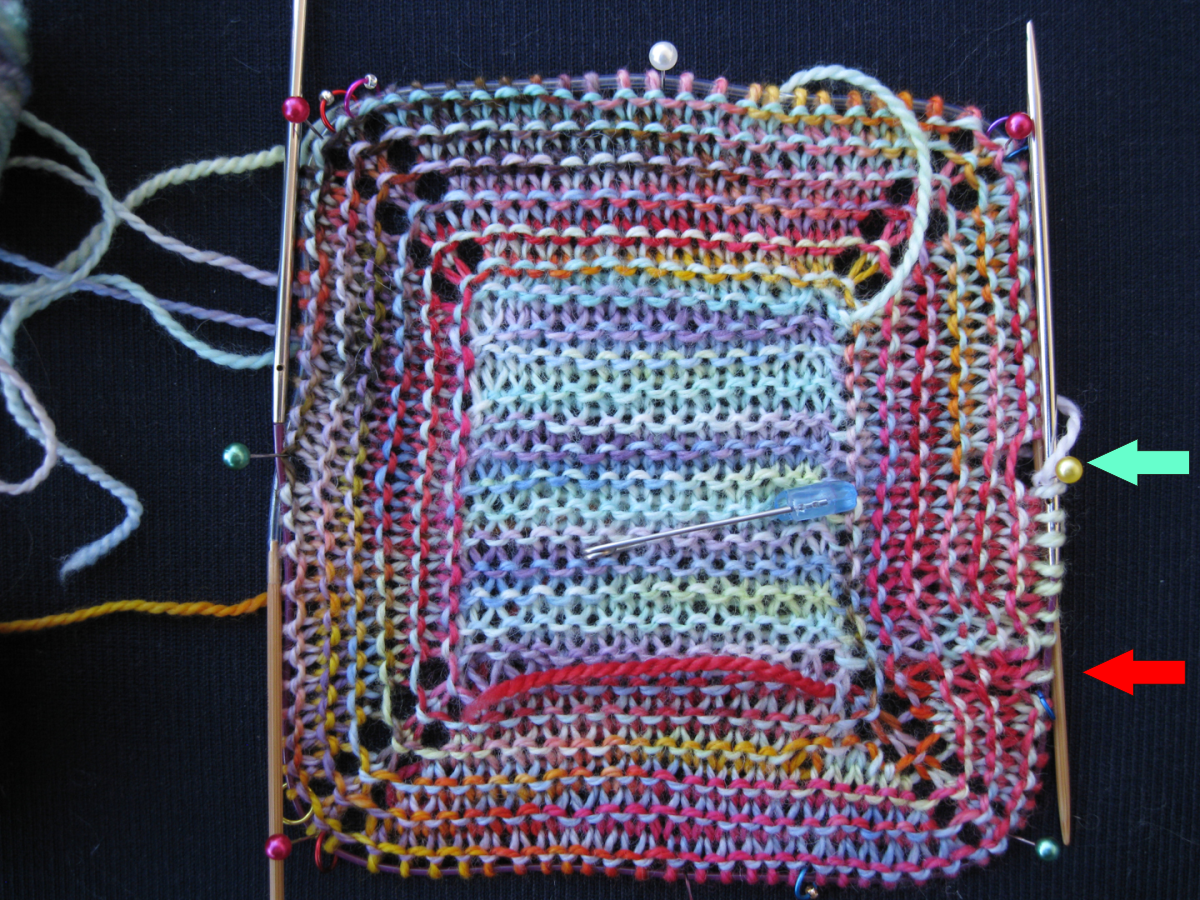


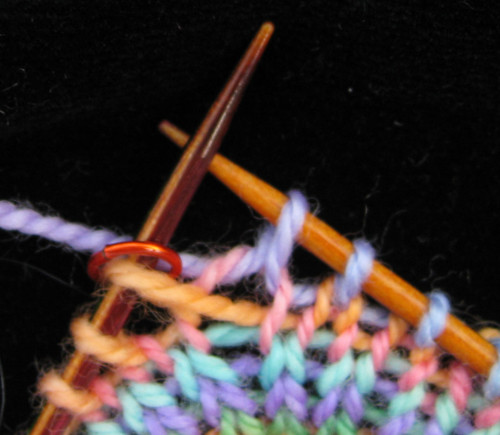
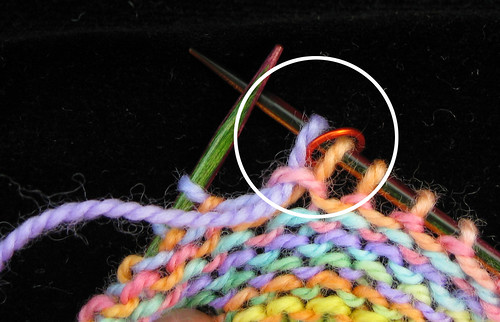
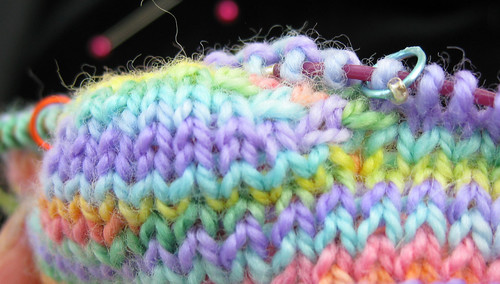
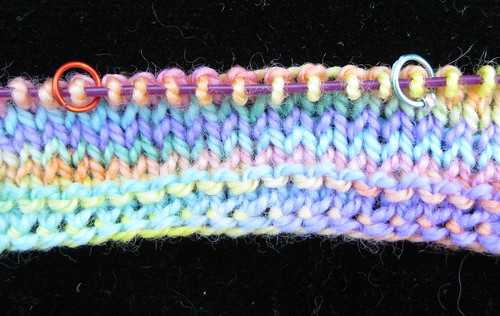
In the sample shown above, the border is knitted flat, not circularly, but there's no discernible seam, is there? The red arrow points to what you might think is the seam, but it's actually the place where the next row begins. Circular knitting, as you recall, isn't really a circle--it's a spiral.


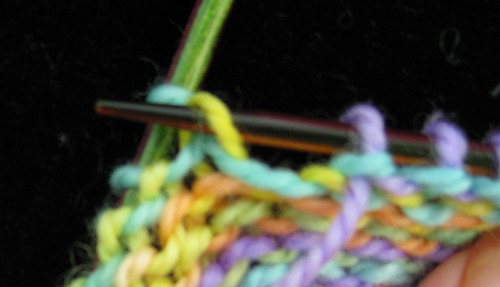
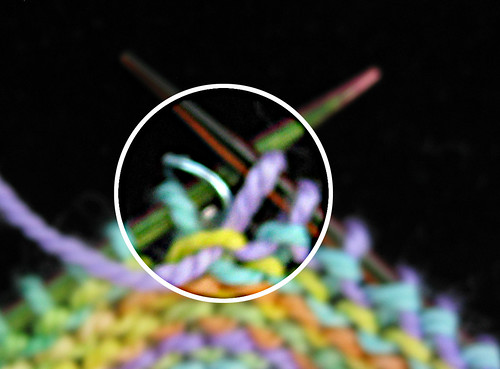
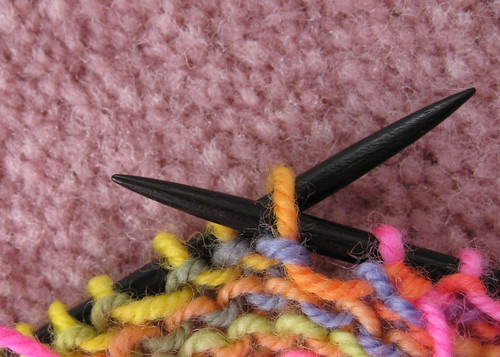
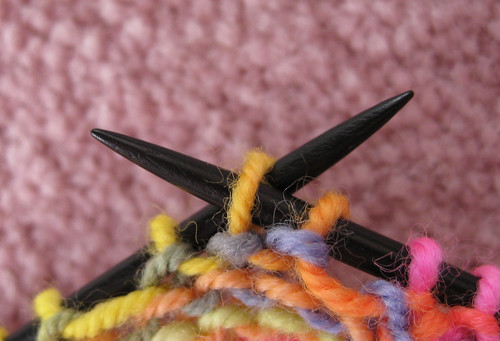
The solution turns (bad pun, sorry) out to be relatively simple: knit the border using two balls of yarn, not one, alternating direction, so that one ball of yarn (A) is knitted in one direction, the other ball (B) in the other direction. The aqua arrow above shows the position of the yarns in the current row and the place where the switch will happen. The trick that makes this solution work is that A and B are going in different directions, there’s no turn at all, and thus no wonky seam line.

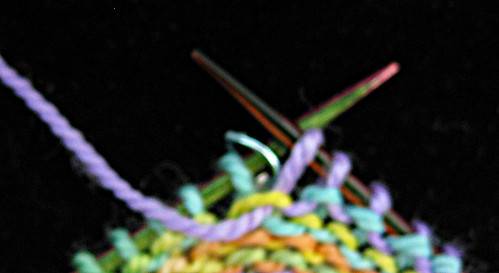
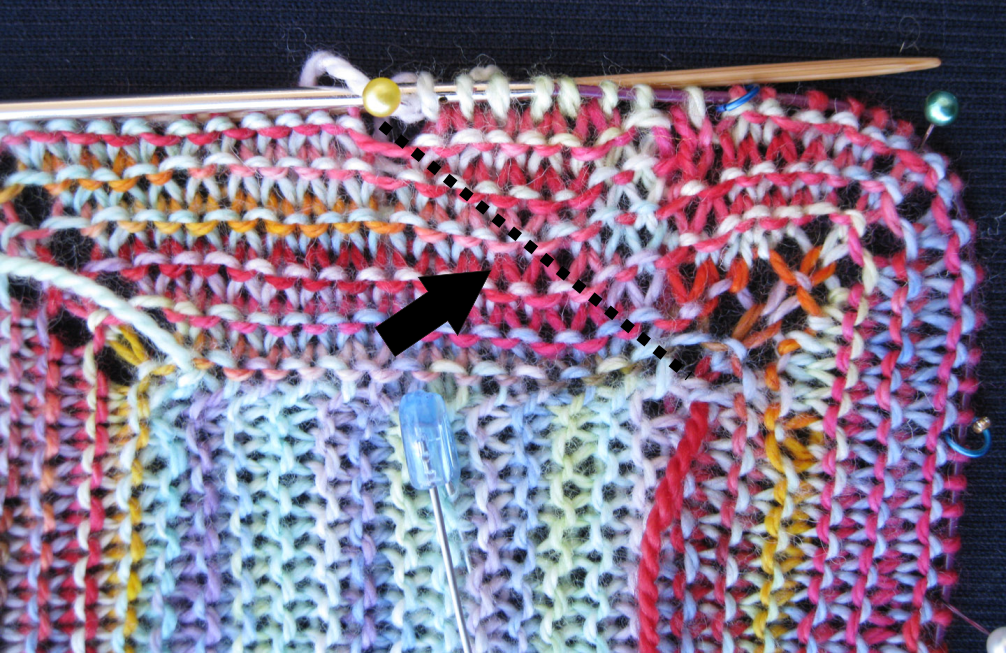
In the image below, the actual color/yarn change for the rows is shown along the dotted black line. Note that the yarn travels one stitch outwards with every other row because of the yarnover increases at the corners. I did a sample where I cheated one stitch and kept the change point in the same place with each row. It didn't make any difference--there still was no seam line.


Here are the directions for a little sample, so you can try this yourself. I used sock yarn scraps in two colors and cast on 13 provisional stitches because I am incredibly lazy and 14 stitches was just too much work. It's a small sample, so when you do the border, you'll need one additional circ or a set of DPNs to go round and round.

Knit a center square with Color A.

Pick (do not pick up and knit) up the stitches along the first side, slip the stitches from the provisional cast-on, then pick up the stitches from the third side, slip the last group of stitches. Don't forget to pick up a stitch at each corner.

Note: At this point, I strongly suggest you rearrange your stitches so that the corners fall towards the centers of your needles, not at the ends. Otherwise, you will be working yarnovers at the ends of your needles, and that's always messy.

You are now at the beginning corner.

Attach color B, turn your work, and knit all the way around to the beginning corner.

Drop B, turn, pick up A, and knit around, working an OKO at each corner.

Drop A, turn, pick up B and knit plain around.

And so on.

In this sample, you will always be doing OKO at the corners with color A and a plain knit row with color B.

I put a safety pin on the side where I should be knitting color A, so I didn’t get confused. Obviously, when you are knitting a real shawl, both balls will probably be the same color. I will therefore put a safety pin on one side of the shawl and a some indicator on the corresponding yarn ball when I use this technique on my Queen Susan shawl.

And, of course, this trick is not limited to shawls--it can be used any time you want to knit garter stitch in the round without purling.

Saturday, September 5, 2009

The Fleegle Symmetrical Short Row--No Wraps, No Holes, No Hassles

I've never been a fan of short rows, mainly because I've never been able to make them look pretty. I've tried all the techniques--yarn overs, Japanese, wrapped, unwrapped, rewrapped, and encroachment-- and frankly, they all look hideous. Or worse, one side looks nice and the other side looks hideous.

Every so often, I pick up my needles and fiddle around with short rows. But it wasn't until yesterday, as I was dozing in the car, that I came up with a new short row technique that actually looks attractive, is symmetrical, leaves no holes, and doesn't require wrapping or safety pins. Those familiar with the fleegle heel will find the concept similar. The only difference is that you are not spacing out the increases to make a gusset. You'll see what I mean when you work the sample (assuming, of course, that you have tried the fleegle heel).

If you want to try this out, I suggest you  cast on 20 stitches. Knit a few rows and place markers around the center 10 stitches, because it will be between these two markers that we shall build a little nose. Note that all slipped stitches are slipped purlwise.

Here's what your row looks like at the beginning:


Knit across the 10 stitches between the markers. Put your needle through the bump behind the 11th stitch...


...and knit through the loop. You now have 11 stitches between the markers.


Turn. Slip the first stitch, which is your "new" stitch, and give it a little tug to tighten it up (important!). Before you proceed, please look carefully at the two stitches on the right needle. They are a pair under a single bump and the pair straddles the marker. I call it "1 pair."


Now purl 10.

Put your needle through the bump in the front of the 11th stitch...


...and purl through it.


You now have 12 stitches between the markers. Notice that you have made another pair of stitches under a single bump straddling the marker.


Turn, slip then first stitch, give it a little tug to tighten it up, and knit 9.

Put your needle through the bump behind the next stitch and knit it. You now have 13 stitches between the markers, and two pairs.


Continue on...

Turn, slip the first stitch, purl 8.  Put your needle through the bump below the next stitch and purl it. 14 stitches are now between the markers and 2 pairs.

Turn, slip, knit 7. Pick up the bump in back and knit it (15 stitches between markers and 3 pairs).

Turn, slip the first stitch, purl 6. Pick up the bump in front of the stitch you just purled and purl it (16 stitches between markers and 3 pairs).

Turn, slip, knit 5. Pick up the bump in back and knit it (17stitches between markers and 4 pairs).
 
Turn, slip the first stitch, purl 4. Pick up the bump in front of the stitch you just purled and purl it (18 stitches between markers and 4 pairs).

Now we are ready for the second half of the short rows. The basic concept is that you will knit (or purl) one stitch further on each side by knitting (or purling) two stitches together. Do pull out the slack when knitting these. Otherwise, you'll have loose stitches that will make you sad.

Here is an annotated photo showing which stitches get knitted together.


Turn, slip the first stitch, knit 5, pull on the yarn to remove slack, knit 2 together.

Turn, slip 1, purl 6, purl 2 together or purl 2 together through back loops. I prefer the way P2tog looks, but you may like P2togtbl better.

Turn, slip the first stitch, pull on the yarn to remove slack, and knit 7. Note that the 7th stitch is the K2tog from the previous row. If you make a note of these decreases, you won't get confused as to how many stitches you should be knitting or purling plain. Knit 2 together.

Turn, slip 1, purl 8, P2tog.

Turn, slip the first stitch, knit 9. K2tog.

Turn, slip 1, purl 10, P2tog.

Turn, slip the first stitch, knit 11. K2tog. Do not turn. 

Knit to the end of the row.

Turn. Purl 12 across the center markers, P2tog.

And here's what the left side should look like:


And the right side:


And the front (sorry, it's hard to photograph a nose):


Given this basic technique, many modifications are possible. You can use a different increase (knit front and back, for example). And you can change the directions of your decreases. Experiment and see what works best for you. If you have an improvement, do let me know!

Wednesday, June 10, 2009

Purl Decreases Demystified

If you hunt around the Internet in search of purl decreases, you will probably encounter only two: the right-slanting single decrease (P2tog) and the right-slanting double decrease (P3tog). There may be times, however, when you need single or double left-slanting purl decreases or a double purl decrease with no slant at all.

Most commonly, you will encounter these snarky decreases if you are knitting garter-stitch lace in-the-round, for example, a borders-outward shawl in a single piece. To maintain garter stitch in the round, alternate rows must be purled (unless you are cheating and going to futz one corner so you can knit back and forth). And if you are knitting Shetland lace, there's probably no way you will escape having to work double purl decreases with no slant. Central double decreases abound in Shetland patterns.

After perusing my standard books, such as Barbara Walker's Charted Knitting Designs, and rejecting most of the solutions as kinda awkward, I fiddled around with a few different ways of accomplishing these dratted decreases. Some people hate purling through the back of stitches. Others don't find this uncomfortable. Please try all these methods and decide which one works best for you.

Left-Slanting Single Purl Decrease

The most common method is purling through the back of two stitches thusly:


the finished stitch on the purl side:


And finished stitch on the knit side:


If you hate this process, then slip two stitches, one at a time, knitwise.

first stitch slipped...


.... second stitch slipped.


Then insert the tip of the left needle through the front of these two stitches (which are now on the right needle)...


and slip them back to the left needle as a unit. Notice that the stitches have switch positions.


Purl these two stitches together.


Here's the finished stitch on the purl side:


And here's the knit side:


The second method seems easier to me for purling together two stitches when one of them is a yarnover. But sometimes I just purl through the back. Which method I choose depends a great deal on the yarn--some yarns don't like the back stitch, some don't like the slip-and-flip business. Take your pick :)


Left-Slanting Double Purl Decrease

This is just an extension of the single decrease, but with added torment. No matter which method you use, the process is awful. My favorite method, not described here in detail, is to avoid patterns that require me to do this.

Anyway.

You can purl through the back of three stitches:


Here's what it looks like on the knit side:


Or, slip three stitches, one at a time, purlwise.


Then insert the tip of the left needle through the front of these three stitches (which are now on the right needle),


and slip them back to the left needle as a unit.


Then purl these three stitches together.


Here's the purl side:


The he knit side looks the same as knitting 3 stitches together through the back loops as shown above, so I didn't take another photo.

Yet another method is described in the Walker book. Purl two stitches together. Keeping the yarn in front, put the stitch back on the left-hand needle. Pass the next stitch over this one, then transfer to the right-hand needle. I frankly don't care for the way it looks, but it's simpler to execute.


Double-Purl Decrease with No Slant (Central Double Purl Decrease)
This one is actually pretty easy. The literature I encountered had some wacky solutions; I think my answer is simpler. The first two steps are identical to the Left-Slanting Single Purl Decrease shown above.

Slip two stitches, one at a time, knitwise.
Then insert the tip of the left needle through the front of these two stitches (which are now on the right needle), and slip them back to the left needle as a unit.

Purl three stitches together (the two you slipped and flipped, plus one on the left-hand needle).


Here's the finished decrease on the purl side:


and the knit side:

Thursday, February 28, 2008

A Normality Sweater

I love inventing ways to do things--the invention process is often so much more intriguing than actually knitting the object. Once I've worked out the principle, I find myself wishing for an apprentice who could just follow my notes so I don't actually have to knit the darn thing.

Alas, I have no apprentice (applications are being taken now!), so after figuring out how to work this sweet little sweater, I had to produce a finished object, otherwise nobody could figure out what I was babbling about.

What?
In this post, I will demonstrate the principles of sideways seamless construction, which can be applied to all sorts of useful and non-useful things--toys, hats, doorknob covers, whatever. Pithy directions follow all the picture stuff.

Why?
Sideways construction has several things to recommend it.

First of all, most people look, um, not so wonderful in horizontal stripes. But knitting a regulation sweater with vertical stripes is about as fun-filled as, say,sleeping on golf balls. Each stripe requires a different ball of yarn just waiting to tangle up with all the other balls of yarn dangling from the needle. If you forget to twist, you get a hole. Face it, you don't see a lot of striped intarsia sweaters. But knitting a vertically striped sweater sideways requires only that you change yarn color after each stripe. And you can decide on-the-fly just how wide you want the stripes to be.

Second, some types of yarn are inherently droopy--cotton and silk for example. Sideways construction can alleviate the tendency of these fibers to stretch and sag.

Thirdly, you can easily try on the sweater as you go along, as demonstrated by Larry in the accompanying picture essay.

And lastly, it's just fun to do things at a 90-degree angle. All sorts of interesting problems present themselves to be solved with incredible cleverness or brute force, depending on your attitude and and/or Clever Quotient.

So, onwards to the lesson.

How?
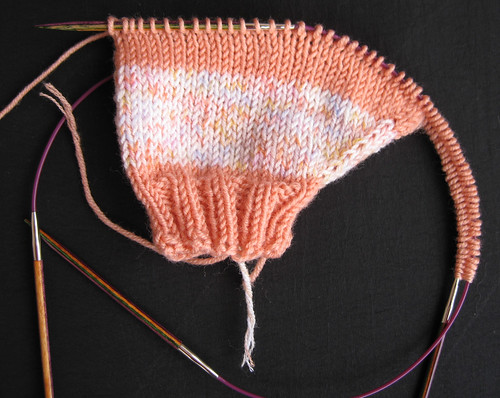
Here we have a perfectly normal little sleeve knitted in the round on two circular needles. Anyone who has knitted a tube will know how to do this. (If you don't, the Internet is full of information about this technique.) From this tiny acorn, we shall make a sweater grow.


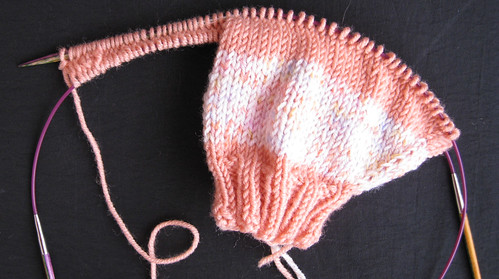
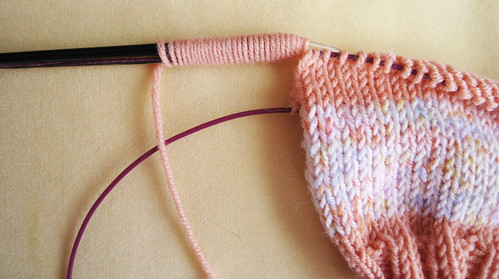
First, we cast on the stitches for the front and back using my beloved Turkish cast-on. This fancy and exotic name just means: Wrap the yarn around two needles--couldn't be simpler.


The yarn is at the bottom front of the sweater, so I turn the needles over so the knit (right side) of the garment is facing me and knit back. I am putting a moss stitch band at the bottom edge. Alternatively, you could knit the entire garment plain and pick up the stitches later for a ribbed bottom edge.

You have to be a bit careful here to pick up the correct needle to knit back. If you do it wrong, you'll find you will get up to the sleeve and suddenly, the purl size is facing you. Whoops--better start over.

The sleeve stitches are now shoulder stitches.

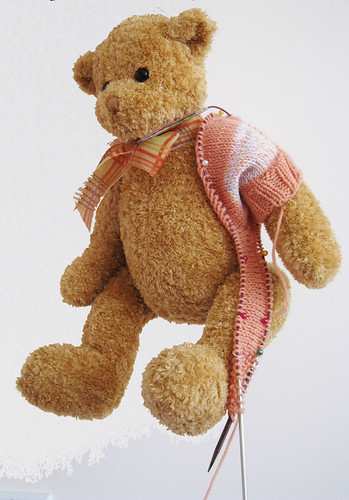
As I cruise over the shoulder, a lovely sight greets my eye, namely, all the back stitches just waiting for me to knit up.


And so I do. Now I am at the lower edge of the sweater back.


I turn, and purl back to the front again.


Basically, I am knitting a U-shaped object. The curve is the shoulder and the legs are the front and back sides. Here we are a bit further along.
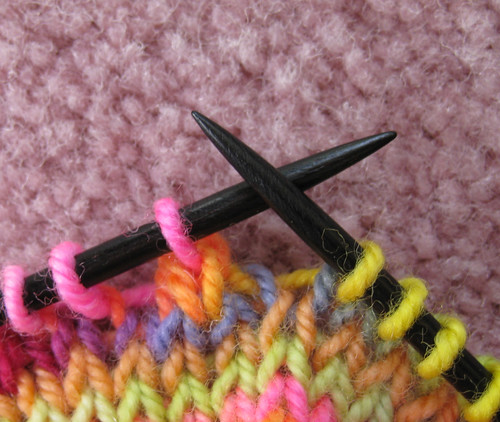

Continuing on, I finish the shoulder area. Here's a side view.


And then, the back and front must part ways for a while, because we do need a hole for the head. If you forget the hole, I suppose you could steek it, but that's way beyond my area of expertise. You are on your own if you decide to cut and sew.

For the neck area, instead of knitting back and forth over the entire garment, we shall knit the front back-and-forth and the back forth-and-back. Um. How about: The front and back are knitted separately to accommodate the neck area. The shapings are the same.

Once we have finished with the neck, the back and front have a joyous reunion at the shoulder.


When the second shoulder area is complete, I carefully isolate the sleeve stitches with markers because I tend to daydream and do stupid stuff like bind off the entire side, thus producing an inventive one-armed sweater. Do not ask me how I know this.

The yarn is at the bottom edge of the front. I turn the garment inside out and do a 3-needle bind-off up to the sleeve stitches.

And whipping out my trusty second circular, I finish off the second sleeve.

And finally, I pick up the neck stitches and do an inch of ribbing.
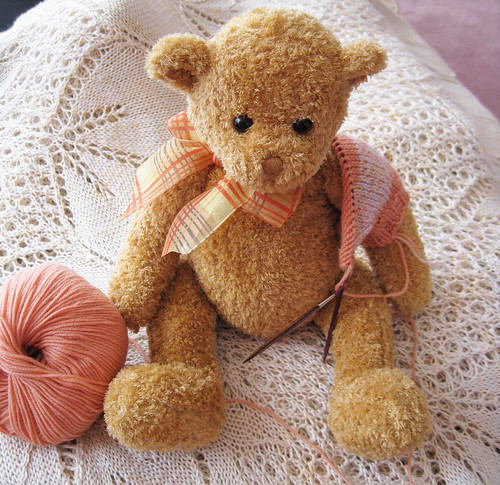

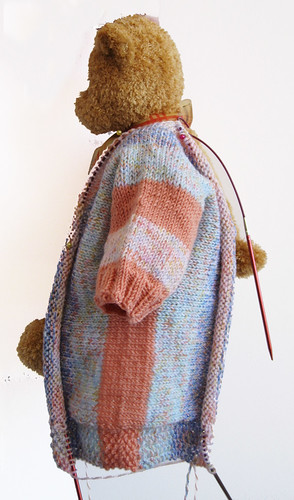
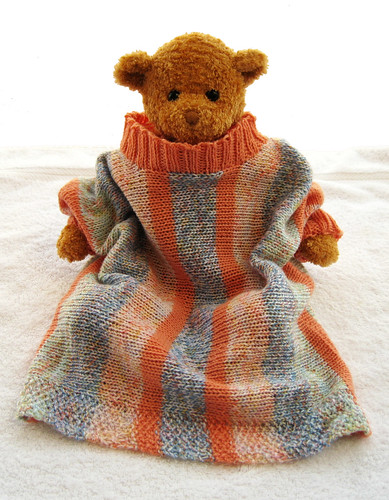
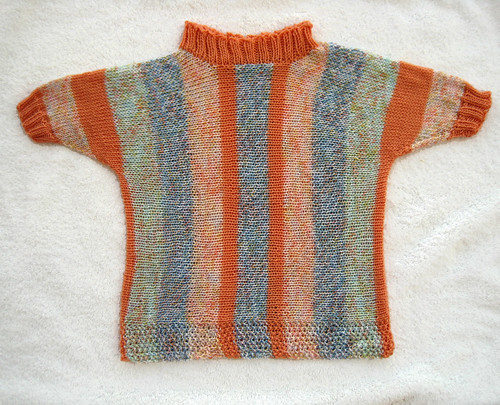
Here is the garment shown flat.

I used four colors of a weird yarn (Stampato Color Baby) that I found in a teeny yarn store somewhere. It's a nice 100% merino fingering weight and the garment needed about 300 yards with size 3 needles (size 2 for the ribbing). I changed colors every 12 rows, but if I were to knit a second sweater, I would use self-striping sock yarn, because weaving in all those ends were way too much trouble for a lazy knitter like me.

Pithy Directions

Using smaller needles, cast on 36 stitches and join in a circle.

Rib for 9 rounds (K2P2).

Knit 1 row.

Increase 4 stitches evenly across the next row. (40 stitches)

Change to larger needles and knit 1 row.

Increase 1 stitch at the beginning and end of every other round 9x. That is, increase 18 stitches. (58 stitches).

Cast on 39 stitches by wrapping the yarn around the needles 39 times. The 9 stitches at the bottom edges in the sample are worked in moss stitch. Alternatively, cast on 30 stitches and when you are finished with the rest of the sweater, pick up 96 stitches across the bottom and knit 9 rows of K2P2 ribbing.

Work 36 rows for the shoulder area.

Split for neck (front and back are worked identically):

Decrease 1 stitch at the neck edge 6x.

Knit 24 rows.

Increase 1 stitch at the neck edge 6x.

Join front and back by knitting without turning at the neck.

Knit 36 rows for the other shoulder.

Place markers for the sleeve--the easiest way is to count 39 stitches from the bottom edges of the front and back.

Turn the garment inside out and do a 3-needle bindoff of the body stitches. Or graft the 39 stitches together, if you like.

Place the 58 sleeve stitches on 2 circulars and decrease 1 stitch each side every other row 9x. (40 stitches)

Knit 1 row.

Decrease 4 stitches evenly across the next row. (36 stitches)

Change to smaller needles and knit 1 row.

Rib for 9 rounds (K2P2).

Pick up 96 stitches around the neck area with the smaller needles and rib for 9 rows.

Bind off really loosely--babys' heads are larger than you think they are.

Saturday, December 15, 2007

Yarnival, December 15, 2007

Happy Holidays, everyone! I hope the next few weeks bring you delicious food, presents filled with knitterly happiness, and the stamina to face yet another year of casting on, frogging, and staring hopelessly at Internet pages crammed full of expensive yarn.

Some Yarnivals have themes, but I couldn't come up with brilliant, cohesive topic. Consequently, this Yarnival is basically a little bag of stocking stuffers. I had a wonderful time compiling these entries, and I do hope you have an equally entertaining time reading them.

Tooling Along

I read this incredible story a few months ago, and still can’t believe that anyone could be so driven to produce the perfect, complete, set of Hybrid Mutant Ninja Interchangeable Knitting Needles. I am profoundly envious--my father was a man of many talents, but he had trouble differentiating one end of a screwdriver from the other.

Most of us cherish Colourmart with their mouth-watering range of inexpensive cashmere, but the cones of yarn can be awkward to work with. Z’s Momma solves this problem by inventing an inexpensive cone holder and posted instructions on how to make one for about eight bucks.

Like many knitters, I tend to scratch directions, tips, and modifications into a little notebook, where they promptly lose themselves amidst a forest of similar scribblings. For those of us with less-than ideal note-making skills, Kathryn Ivy presents well-organized, handsome journal templates for both knitting and crochet.

One of the standard items in my knitting bag is a crochet hook—invaluable for picking up stitches, binding off, making picots and bobbles, and snaring little onions out of mixed drinks. Girl On The Rocks is never without one, thanks to her nifty keychain crochet hook.

Don't put away the needle-nosed pliers quite yet. After you've finished making the mini-hook, you can wander over to Turtle Girl's blog, where she shows you how to make a customized row counter, using a few beads and an hour’s work.

Like sewing? Have a disorganized straight needle collection? Craftster shows you how to convert a used hardback book into a handsome needle holder. She used an old physics textbook and the results are unquestionably unique. The fact that you cheerfully tear the book apart makes me wish I had saved my much-despised organic chemistry text from college. Who knew?

Hate sewing? Have a disorganized circular needle collection? Check out pieknits’ no-sew circular needle holder. It’s cute and easy to rig from empty thread spools. Of course, if you hate sewing, you might not have any empty thread spools...

Like sewing? Need something to hold your knitting and all the other stuff you just made? UHandbag shows you how to make a pop-open/spring shut 14” tote with a useful little accessory pocket.

Photographing your work, be it proto-kitting, knitting, or a finished piece, can be difficult. A lightbox makes it a lot easier to take accurate pictures of your stuff. Professional light boxes are expensive, but LollyKnittingAround explains how to make a portable lightbox for less than $20.

Strobist uses a similar light box and explains how to use it for taking exquisitely detailed macro photographs.


A Few How-To's

The Experimental Knitter gives us a new, simple, elastic cast-on particularly appropriate for Guernsey sweaters. Best of all, it doesn't require a long tail.

Now that you've cast on, perhaps you want to embellish the fabric a bit. FluffyKnitterDeb’s wonderful beading tutorial shows you how to easily add beads with a crochet hook, so you don’t have to string trillions of little tiny beady things before you actually start knitting.

BadCat also has a wonderful beading tutorial on the same topic, complete with clear, easy-to-follow instructions.

And if you have finally completed your fabulous shawl, well, somebody actually submitted one of my own posts! How could I not include it, seeing as how this is my Yarnival? My faithful readers will already have blasted past this entry. The rest of you (fleegle who?), especially those to whom grafting is either a mystery or a nightmare, can check out my incredibly frothy description of Grafting for Dummies, complete with visuals of goofing up.

If you have a teeny-tiny doily pattern you adore and want to see it Writ Really Large, The Doily Underground gives an exhaustive analysis of doily-to-afghan conversions.

And speaking of lace (but also applicable to any knitting), MimKnits has a superb set of lessons on directional decreases. She shows numerous examples of yarnover/decrease placement, so you can see the visual effects of the variations. And once you finish reading Part 1, do go through the rest of her tutorials. They are all terrific.

Those who read my blog will understand that Harry, the Giant Knitting Spider, couldn't help but contribute a post about mending webs with yarn. Harry was also thrilled with Nina Katchadourian's Advertising Kit for Spiders, which allows him to integrate ads for karaoke machines and spicy cocktail onions (his favorite snack food) into his remarkably sloppy web.

Great (and Not So Great) Yarns

Fiber Fool clearly spends a lot of time knitting socks, and she has written an excellent, detailed comparative review of eight popular sock yarns. The sample socks are a bit of eye-candy, too!

Want to recycle an old sweater? Neauveau tells you how here. Frogging can be fun, especially if you use your future ex's knitted clothing!

Tired of knitting with ordinary yarn? Yearning to dabble in new media? Knit some marzipan, for a change. The results are amazing! And edible! First check our VeganYumYum's incredible cupcakes here, then motor on to her how-to tutorial here.

If you don’t have a sweet tooth, be aware that Ramen noodles make a splendid substitute for yarn. Watch the video and entertain yourself and your friends the next time you are in a Ramen restaurant.

Entertainment

If you are bored at work (or anywhere, for that matter), you can indulge in a bit of Knitting Boggle, courtesy of The Purloined Letter.

Double Helix obviously spent a lot of time defining variations of the humble swatch. Her lexicon is hilarious.

There’s no pattern here, but as the wife of a retired police lieutenant, I did enjoy this bit of knitted eye-candy.

And finally, if you are getting older and grayer by the second, rejoice! Go Knit In Your Hat has designed the retirement community of your dreams: Purlin’ Acres. Please do not apply for a few months, while I work my application over. Frankly, I wouldn't mind moving there now.


Thursday, December 6, 2007

Seams to me...

...are an incredible bore. Invariably, when I see a pattern I like, my eyes flow first to the bottom of the page. If I see the dreaded words "Sew seam..." or worse, "Sew seams..." I examine the pattern carefully to see if I can alter it so the last line reads: "Weave in ends."

Thus, when I was bitten by the Bootie Bug and plowed through dozens of adorable patterns, all of which ended with "Sew seams...", I figured there Had To Be A Better Way.

And of course there is. The techniques are adapted from my toe-up sock pattern and will work for many patterns that require endless (and useless) seaming. Any pseudobag-shaped object can be adapted to the Fleegle Seamless Method (FMS for short). For example, I have an adorable pattern for a Shaun the Sheep mobile. Every sheeplet requires at least one seam, but by applying the FMS to these objects, most of the seams are history.

The two examples I will present are both booties, but once you have tried it once, FMS is obvious and you can gleefully apply it to all sorts of things. The directions given here use two circular needles, but of course DPN fans can adapt it to five sticks.

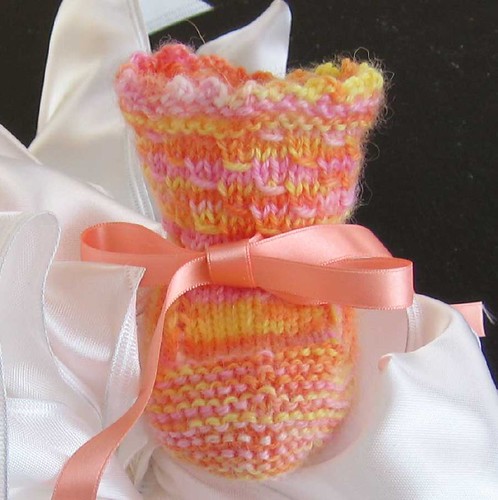
The first pattern is for my seamless bottom-up bootie. I know I promised you guys this pattern last summer, but other things took precedence (translation: Writing patterns is not my favorite thing.)

Fleegle's Seamless Bottom-Up Booties


Cast on 36 stitches using the Turkish cast-on. You will have 18 stitches on each needle.

Knit the first needle. You are now at the beginning of the rounds. You can place a marker, or just use the yarn dangle to indicate the beginning of the rounds.

*Purl 1 round
kbf (Knit in the back and front of the stitch), knit to last stitch, kbf*

Repeat these two rounds 5 more times--60 stitches, 30 on each needle.

Work 10 more rounds of garter stitch--K 1 row, P 1 row.

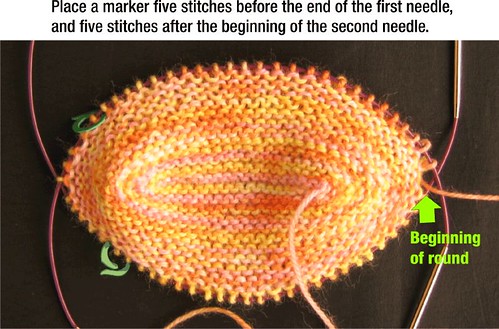
On the last purl row, place a marker 5 stitches before the end of the first needle and another marker 5 stitches after the beginning of the second needle as shown here (click on the picture for clearer text):


Rearrange Stitches

Sorry to go all Cat Bordhi on you here. This step isn't absolutely necessary, but you will find it easier to work the toe-turning business if you rearrange the stitches.

We will designate the first needle as the instep needle and the second needle as the heel needle.

Place a different colored marker at the beginning of the second needle (now the heel needle) to mark the beginning of rows.

Move the first 12 stitches from the first (instep) needle to the heel needle.

Move the last 13 stitches on the heel needle to the first (instep) needle.

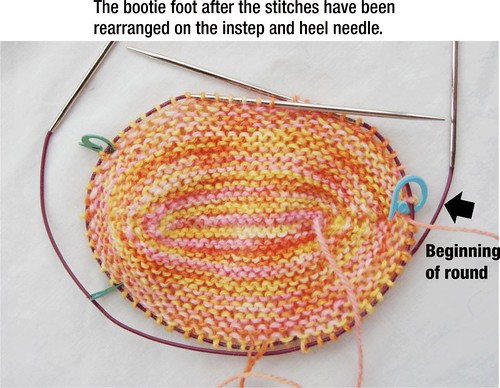
The instep needle should have 13 stitches, a marker, 10 stitches, a marker, 13 stitches.

The heel needle has 12 stitches, the beginning-of-round marker, 12 stitches.

Your bootie should now look something like this:


Notice that the working yarn is in the center of the heel needle. Knit across the 12 remaining stitches on the heel needle, then knit 23 stitches on the instep needle. You are on the far side of the instep.

Turn Toe

k3 tog tbl (through the back loop), turn, sl (slip) 1
p9, p3 tog
turn, sl 1

* k10 k3 tog tbl
turn, sl 1
p10, p3 tog *

repeat from * to * 4 more times

k10, k3 tog tbl
Do not turn. continue knitting across heel needle.

When you get around to the instep needle, k3 together, then knit around to beginning marker.

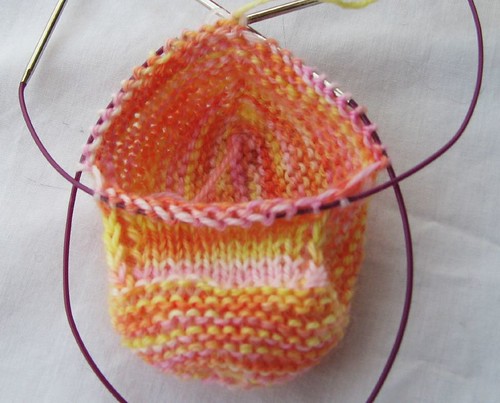
Your bootie should now look something like this:


Uppers

Booties are notorious for falling off tiny feet. You can help them stay on by knitting an eyelet row, through which you can thread a ribbon, I-cord, string, rubber band, or tiny handcuffs.

Optional eyelet row:

*k1, YO, k2 tog* repeat from * to * end.

At this point, you can do anything you like. In the example shown here, I used the following pattern:

Rounds 1 and 3: Knit
Round 2: * K2, yo K2, pass the yo over the 2 stitches just knitted* repeat from * to end
Round 4: * yo K2, pass the yo over the 2 stitches just knitted, K2 * repeat from * to end

And here are two delicate little ribbing patterns that I also use frequently:

Little Ribbing #1

rows 1-3: k2 p2
row 4: k2tog, O, P2

Little Ribbing #2

R1: p2,k3
R2:p2, sl1k2 psso
R3: p2,k1,yo,k1
R4: p2,k3

In my next post, I will give you the pattern for fleeglized Sartjee booties. These were a bit of a challenge, but they were so cute (and had so many seams and ends to weave in) that I just couldn't resist simplifying the pattern.