A while back, I wrote a post about making a more efficient beading crochet hook by gently applying a Dremel to the shaft of a crochet hook:


With my usual impeccable sense of timing, I started thinking seriously about more efficient beading methods after finishing the capelet. I have gathered here all the tools and techniques I could find, and present you with the options, complete with photos and
Crochet Hook
The tiny crochet hook is probably the most common method of adding beads to your knitting. You put a bead on the hook, snag the stitch, and pop on the bead:

An ordinary crochet hook can hold about four or five beads, which means you have to reload fairly often. Sanding down the shaft can increase your, um, bead magazine to about a dozen or so, but for something like the capelet, the crochet hook is wildly inefficient.
Also, the nature of a hook means that it's a bit bulky, so you have to use a tiny size (US #11-14 or so) to ensure that the hook can fit through the bead hole. A miniscule hook can often present an unhappy experience with heavier laceweight yarn by grabbing part of the yarn, separating plies, and can also inadvertently break fibers.
Crochet hooks are easy to find, though, and you can also use them to crochet and fish tiny objects out of crevices.
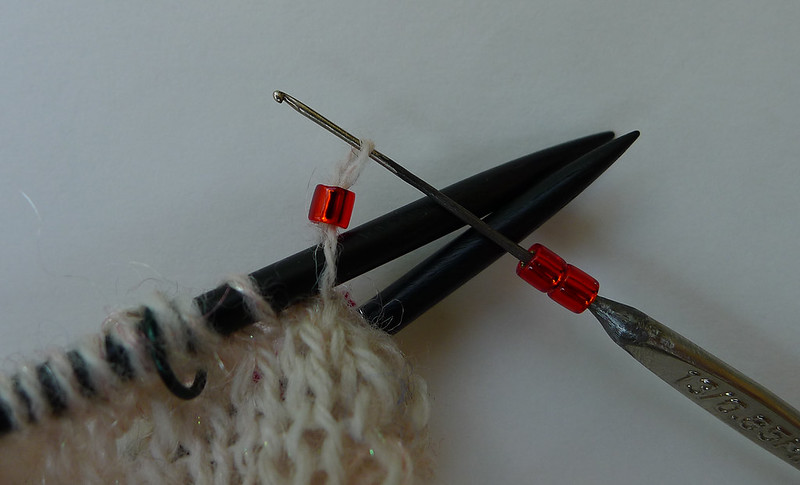
Dental Floss Threaders
The concept is excellent. There's a stiff end for threading and a foamy section on which the beads rest comfortably without sliding. You can string a lot of beads onto these and use the extras to floss your teeth or tie up tomato plants. Threaders are cheap and readily available at any store that carries dentalware.

You insert the stiffened tip through the stitch, pinch the threader closed, and slide the bead over the tip and the yarn thusly:


I don't like using floss threaders, because the tip isn't very stiff, so pinching it closed feels awkward for me. Adding beads can be tedious, too, as it can't be used with a bead spinner. The tip is straight, so it can't be easily parked on the knitting.
On the plus side, threaders are lightweight and can be flopped over your arm or around your glasses.Or you can floss and leave it between your teeth until you reach another beading stitch. Your dentist will be so proud of your sparkly clean molars!
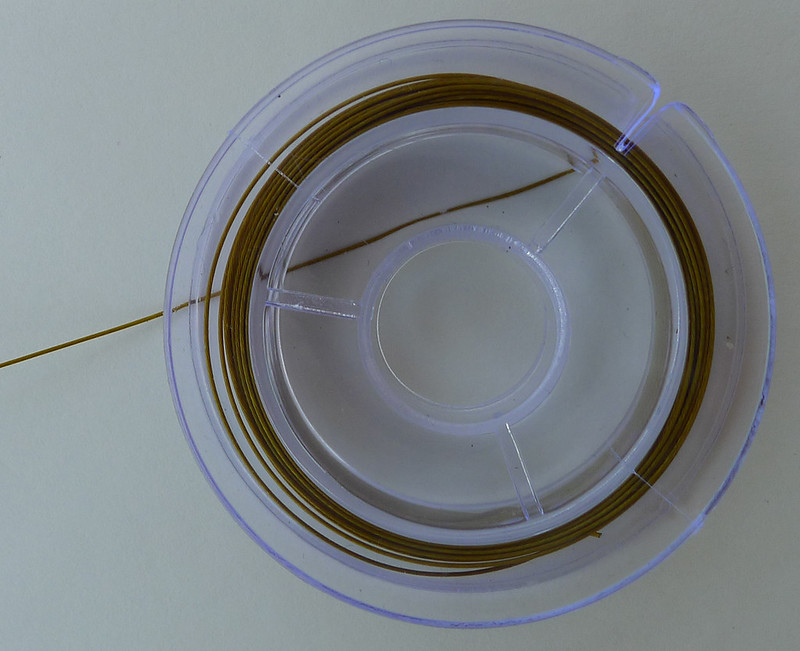
Beading Wire
I read about this technique on Melissa Lemon's blog (she's the Nouveau Capelet designer). It's the same concept as the floss threader, but uses nylon-coated, .015″/.38mm Tiger Tail, which is a flexible, braided stainless steel, nylon-coated wire. It's very cheap and available in almost every bead store.
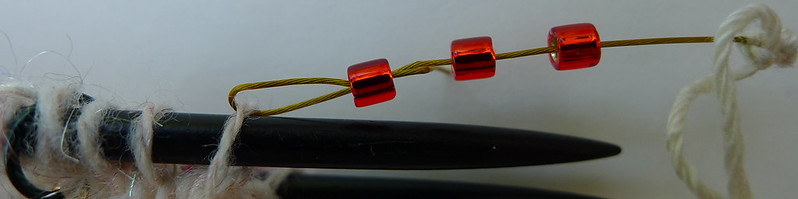
Just cut the wire to the desired length and tie a bead on the non-working end or make a knot to prevent the beads from sliding off. Then make a hook on the working end by folding about a inch of the wire back on itself.
To use the wire, hook the folded section into the stitch, pinch it together with the main section, and slide the bead onto the stitch:
Beading wire is lightweight and has a hook section that can be parked directly on your knitting. You can thread a zillion beads onto the wire, although be warned, cats think a string of beads is a really fun thing to play with. It wiggles and makes a nice clicky sound when whapped with a paw.
On the downside, the wire isn't stiff enough to use with a bead spinner, and its flexibility makes it it difficult to pinch the hook. Any re-bends you make never straighten out, so eventually, you end up with a wiggly hook...
You can cut off the messy ends to make a clean fold, which eventually leads to a short piece of wire capable of holding a single bead...so you have to make another one.
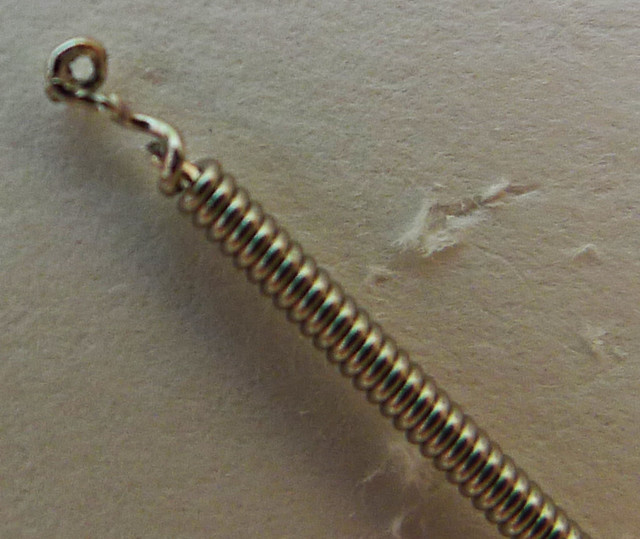
Lacis Verna Beadle Needle
I saw this on Lacis's website and had to have one. The description made it sound like the ultimate, perfect, beaded knitting solution. The Beadle is billed as an eight-inch length of tempered steel with two rubber stoppers, a hook on one end, and a bent section on the other to allow it to be used with a bead spinner. There are several sizes; the one I purchased can hold about 100 beads:

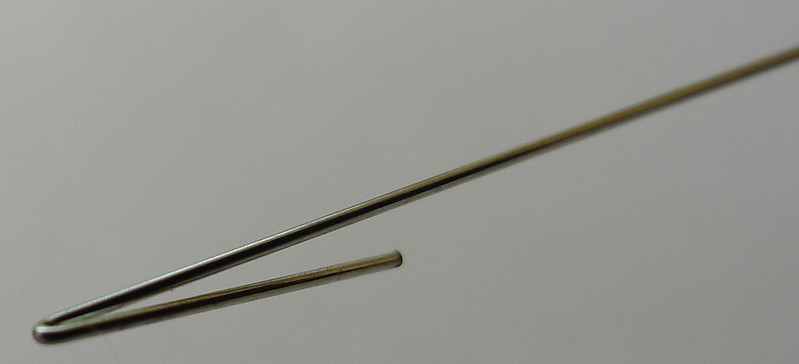
Alas, the description is misleading. There's no hook. Instead, there's kind of a notch:

The notch on the first one I received was so shallow that the yarn just slid right off of it. I used a file to deepen the notch, which made it work well with cobweb weight, but heavier standard laceweight didn't catch in the notch. Jules kindly send me a replacement, which was a little better, but it tends to grab one ply of the yarn and shred it if I forced the issue.


My replacement lacked the bend at the other end for the bead spinner, but it was easy to make a gentle curve with my fingers. However, I found the Beadle too long to be comfortable, and it can only be parked on a table or in your mouth. You have to use the rubber stoppers to prevent the beads from sliding off both ends. No big deal, but the second thing I did after I unpacked the little guy was lose one of the stoppers. They are small, round, and black, so they cheerfully roll under refrigerators and/or hide invisibly in the shadows around your floorspace.
The beadle is also expensive--about $15 without Lacis's, um, handling fee. It's a clever idea and with a little work on the notch/hook, the Beadle could be a pleasantly viable beading solution.
Guitar Wire
I read about using guitar wire instead of a floss threader years ago, but the recommended wire was a size 30, which is actually a wrapped core. I tried using this, but the finer wire wrapping invariably started unwrapping...
And it was too thick and and difficult to bend, at least for my beads and fingers.
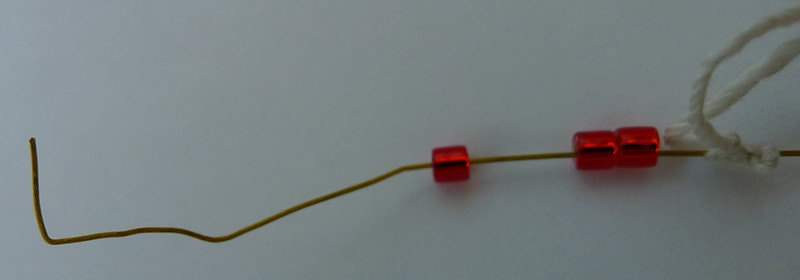
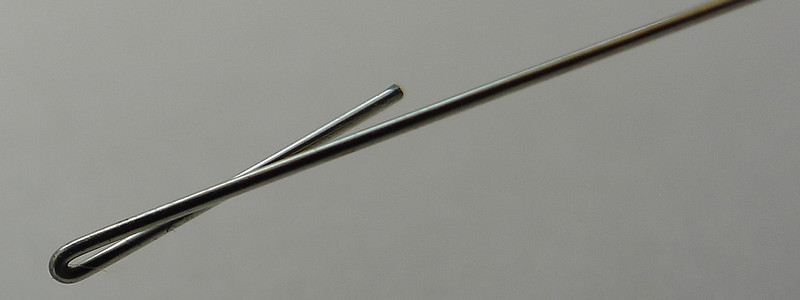
Not to be discouraged, I revisited the guitar wire concept, and found that size 14, a thin, springy, wire, works much better for me. It's thin enough to accommodate every bead size, resilient enough to resist bending, pleasantly lightweight, and won't roll away.

I cut off a comfortable section and used a bead spinner to whirl a bunch of beads onto the non-hook end. No need to make a bend in the wire--it's springy and conforms comfortably to the spinner bowl.


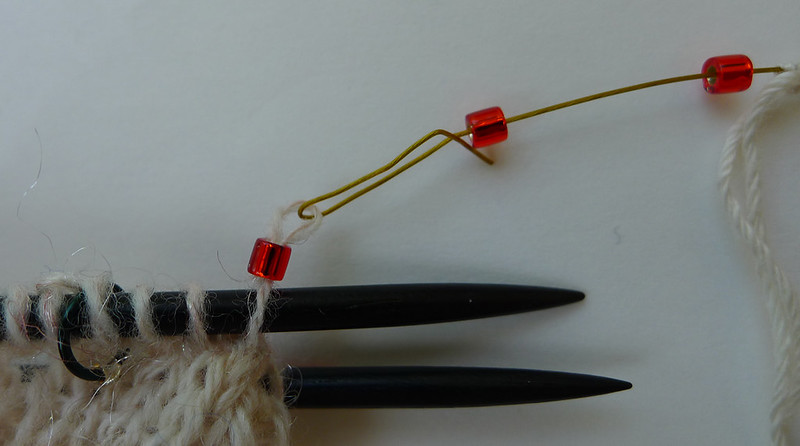
I took a pair of pliers and bent the end into a hook thusly:

Notice that the hook is bent quite far, but from the side, it's open enough to slide in the yarn:
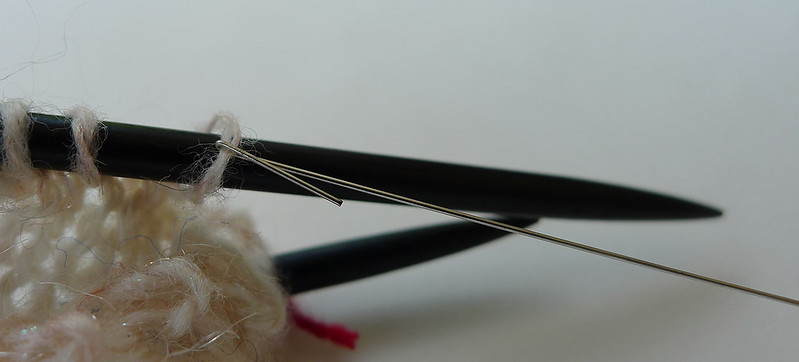
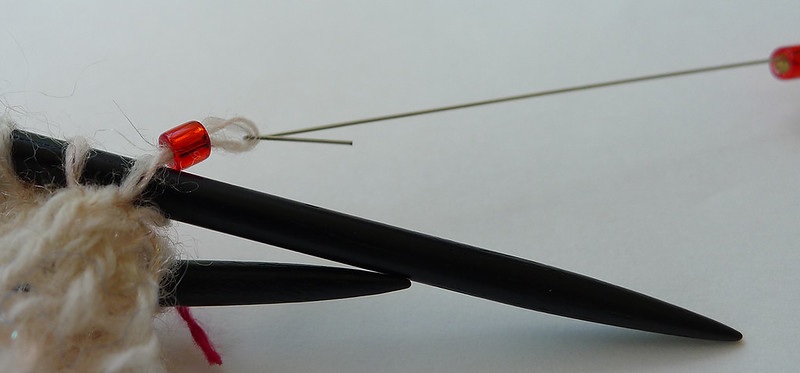
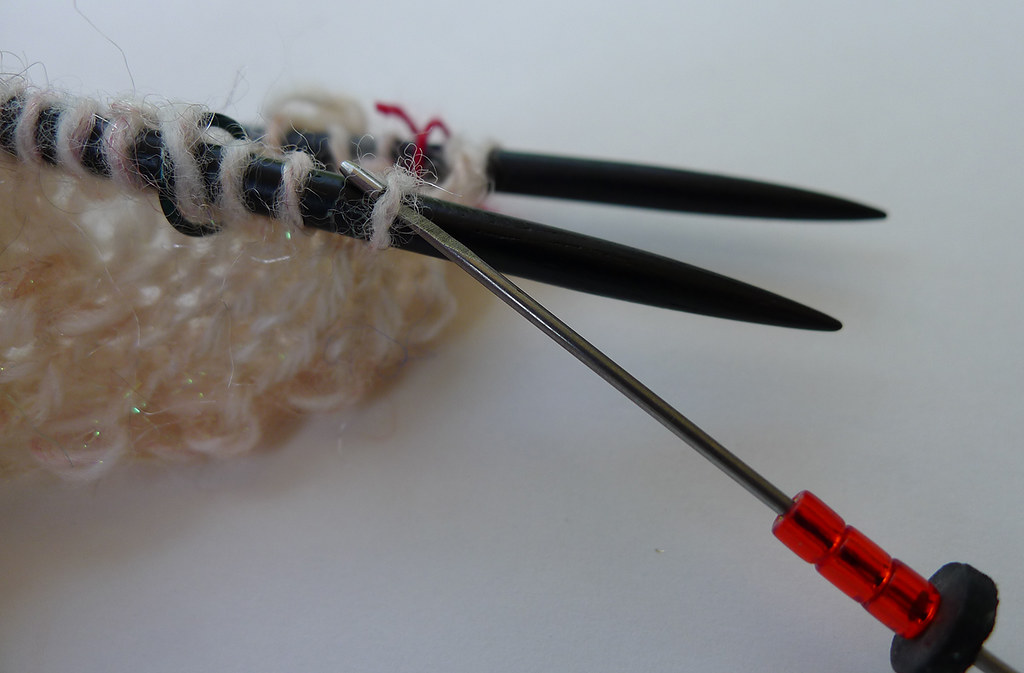
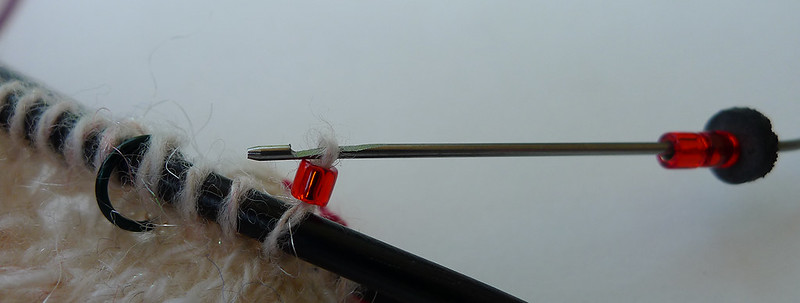
It's quite easy to close the gap by bending the main wire towards the hook--no need to pinch it closed. Furthermore, the guitar wire has several advantages over the other methods. First of all, like the beading wire, the guitar string can be hooked directly onto your knitting:

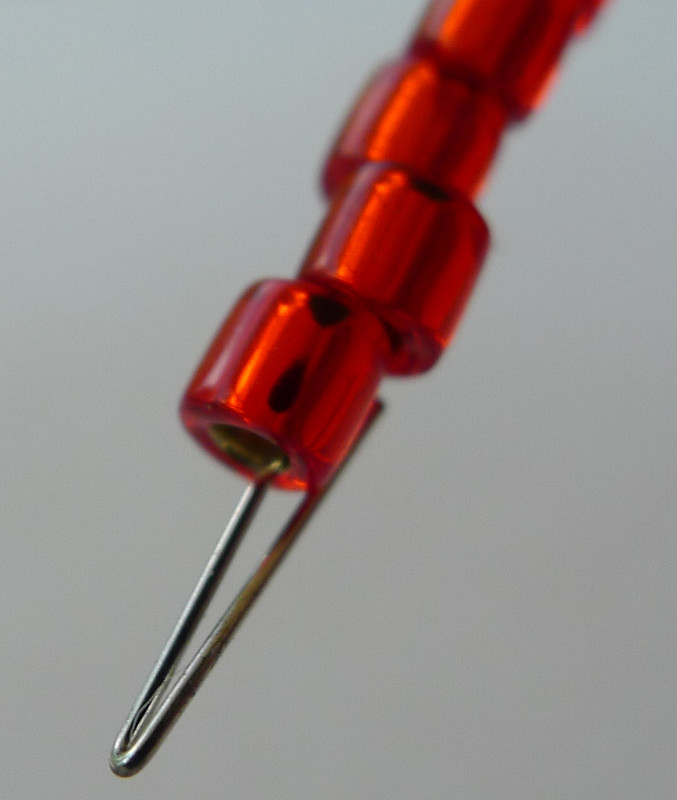
Because there's a slight bulge at the hook end, beads won't fall off that end:
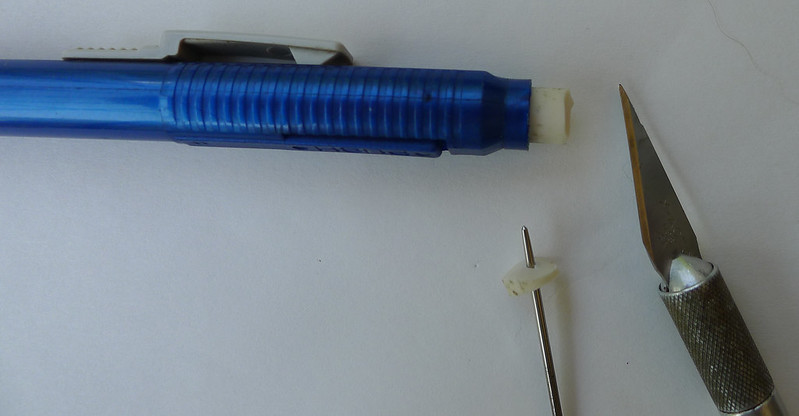
Making stoppers for the other end is simple. Use a sharp matte knife, cut a few slices from an eraser stick. Then poke a hole through each one with a thickish sewing needle and just slide it onto the wire:
Both the Beadle and this thing (the Fleeger? The Bleeger? The Bleegle? The FleegleBeadle? The Guitar-Wire-with-Hook-and-Stopper? ) store nicely in thick plastic straws.
.
