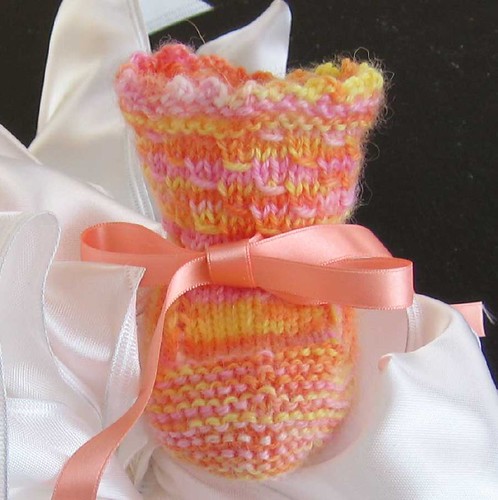
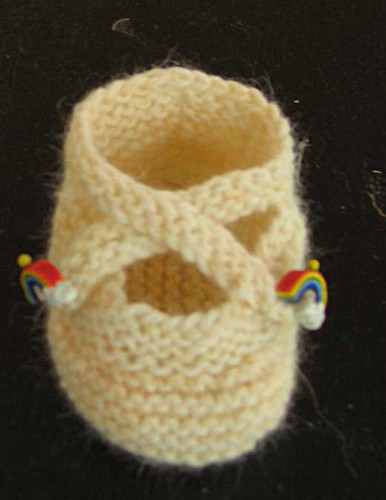
These adorable booties are the invention of a clever Dutch knitter named Saartje. They were irresistible, until I read the directions. Urk! Seams! And zillions of ends, too, whine.
Then I got to thinking that the pattern would be easy enough to adapt to the Fleegle Seamless Method. Here's an alternate method of knitting these little cuties. (The original pattern can be found here.)
Note: I emailed her twice asking for permission to post this altered the pattern, but she never answered me. I tried.
Note Again: Instructions are given for working on two circulars. DPN folks can easily convert to 5 sticks.
Cast on 31 stitches using the Turkish cast-on--15 stitches on needle 1 and 16 stitches on needle 2. I actually just cast on 30 stitches (15 loops), then made an extra loop on the second needle to get the stitch count correct.
Knit across the first needle only. You are now at the beginning of the rounds. You can place a marker, or just use the yarn dangle to indicate the beginning of the rounds.
Row 1: P15, place marker (pm), P1, pm, P15 (Because the marker business falls at the beginning of the needle, I moved a few stitches from the first needle to the second so the marker wouldn't fall off and the increases didn't occur at the very beginning of the second needle).
Row 2: Knit in the back and front of first stitch (kbf), knit to marker, make 1 using a backwards loop (m1), K1, m1, knit to last stitch, kbf (3 stitches between markers)
Row 3: Purl
Row 4: kbf, knit to marker, m1, K3, m1, knit to last stitch, kbf (5 stitches between markers)
Row 5: Purl
Row 6: kbf, knit to marker, m1, K1, m1, K3, m1, K1, m1, knit to last stitch, kbf (9 stitches between markers)
Row 7: Purl
Row 8: kbf, knit to marker, m1, K1, m1, K7, m1, K1, m1, knit to last stitch, kbf (13 stitches between markers)
Rows 9-18: garter stitch, that is purl 1 row, knit 1 row
Row 19: Purl. Change color here if desired.
Row 20: K15, SSK 5x, K1, K2Tog 5x, K15
Row 21: Purl
Row 22: Knit
Row 23: Purl
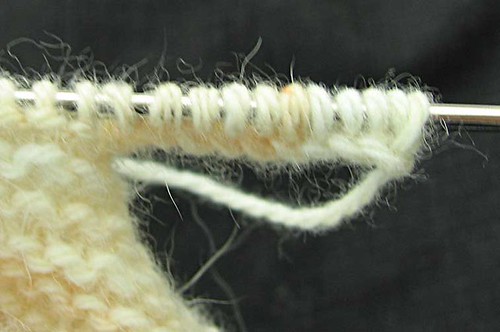
Row 24: Knit 10, turn, cast on 10 by knitting on*, Knit 20, Purl 31, turn.
Here you can see the finished cast-on stitches for the first strap. Instructions for the cast-on are at the end of this post.
Row 25: Bind off 21 purlwise, cast on 10.
Row 26: P20, K20.
With a crochet hook, slip-stitch in the first stitch of the row below, chain 6 (to make a button loop), and put the end of the chain loop back on the left needle.
Bind off 20 stitches knitwise, 20 stitches purlwise.
With a crochet hook, slip-stitch in the first stitch of the row below, chain 6 (to make a button loop), and put the end of the chain loop back on the left needle and slip-stitch the two stitches together. Cut yarn, pull through loop and finally...
Weave in ends.
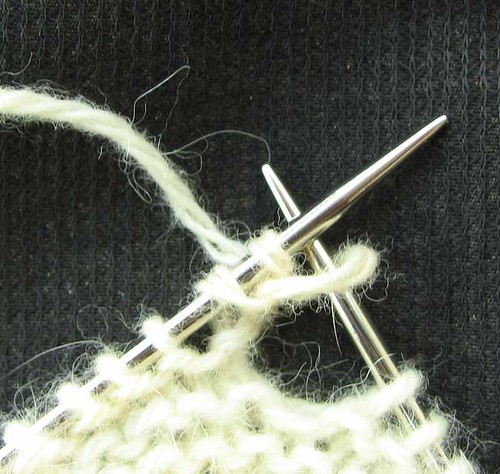
*To cast-on via knitting on, insert the right needle into the first stitch on the left needle, knit through it normally, but don't drop the stitch.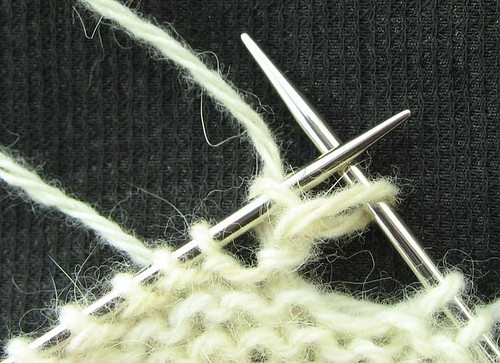
Repeat 8 more times. You should have 10 new stitches on the needle and be in position to resume knitting the next row.
Have fun!
Saturday, December 8, 2007
Saartje's Fleeglized Bootie

Thursday, December 6, 2007
Seams to me...
...are an incredible bore. Invariably, when I see a pattern I like, my eyes flow first to the bottom of the page. If I see the dreaded words "Sew seam..." or worse, "Sew seams..." I examine the pattern carefully to see if I can alter it so the last line reads: "Weave in ends."
Thus, when I was bitten by the Bootie Bug and plowed through dozens of adorable patterns, all of which ended with "Sew seams...", I figured there Had To Be A Better Way.
And of course there is. The techniques are adapted from my toe-up sock pattern and will work for many patterns that require endless (and useless) seaming. Any pseudobag-shaped object can be adapted to the Fleegle Seamless Method (FMS for short). For example, I have an adorable pattern for a Shaun the Sheep mobile. Every sheeplet requires at least one seam, but by applying the FMS to these objects, most of the seams are history.
The two examples I will present are both booties, but once you have tried it once, FMS is obvious and you can gleefully apply it to all sorts of things. The directions given here use two circular needles, but of course DPN fans can adapt it to five sticks.
The first pattern is for my seamless bottom-up bootie. I know I promised you guys this pattern last summer, but other things took precedence (translation: Writing patterns is not my favorite thing.)
Fleegle's Seamless Bottom-Up Booties
Cast on 36 stitches using the Turkish cast-on. You will have 18 stitches on each needle.
Knit the first needle. You are now at the beginning of the rounds. You can place a marker, or just use the yarn dangle to indicate the beginning of the rounds.
*Purl 1 round
kbf (Knit in the back and front of the stitch), knit to last stitch, kbf*
Repeat these two rounds 5 more times--60 stitches, 30 on each needle.
Work 10 more rounds of garter stitch--K 1 row, P 1 row.
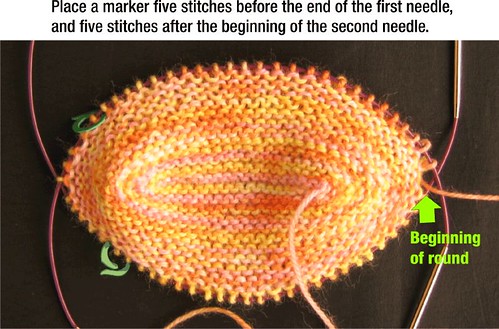
On the last purl row, place a marker 5 stitches before the end of the first needle and another marker 5 stitches after the beginning of the second needle as shown here (click on the picture for clearer text):
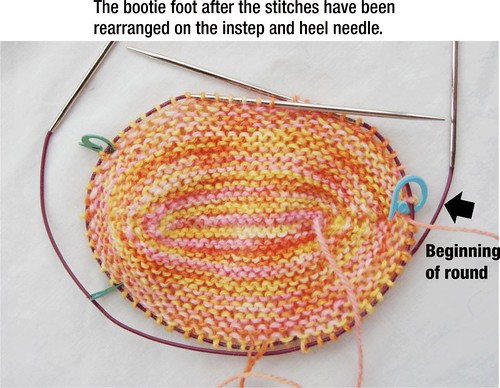
Rearrange Stitches
Sorry to go all Cat Bordhi on you here. This step isn't absolutely necessary, but you will find it easier to work the toe-turning business if you rearrange the stitches.
We will designate the first needle as the instep needle and the second needle as the heel needle.
Place a different colored marker at the beginning of the second needle (now the heel needle) to mark the beginning of rows.
Move the first 12 stitches from the first (instep) needle to the heel needle.
Move the last 13 stitches on the heel needle to the first (instep) needle.
The instep needle should have 13 stitches, a marker, 10 stitches, a marker, 13 stitches.
The heel needle has 12 stitches, the beginning-of-round marker, 12 stitches.
Your bootie should now look something like this:
Notice that the working yarn is in the center of the heel needle. Knit across the 12 remaining stitches on the heel needle, then knit 23 stitches on the instep needle. You are on the far side of the instep.
Turn Toe
k3 tog tbl (through the back loop), turn, sl (slip) 1
p9, p3 tog
turn, sl 1
* k10 k3 tog tbl
turn, sl 1
p10, p3 tog *
repeat from * to * 4 more times
k10, k3 tog tbl
Do not turn. continue knitting across heel needle.
When you get around to the instep needle, k3 together, then knit around to beginning marker.
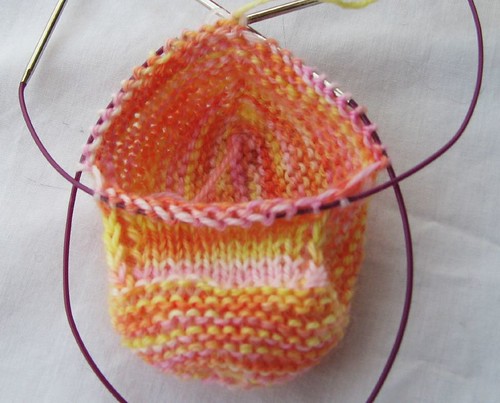
Your bootie should now look something like this:
Uppers
Booties are notorious for falling off tiny feet. You can help them stay on by knitting an eyelet row, through which you can thread a ribbon, I-cord, string, rubber band, or tiny handcuffs.
Optional eyelet row:
*k1, YO, k2 tog* repeat from * to * end.
At this point, you can do anything you like. In the example shown here, I used the following pattern:
Rounds 1 and 3: Knit
Round 2: * K2, yo K2, pass the yo over the 2 stitches just knitted* repeat from * to end
Round 4: * yo K2, pass the yo over the 2 stitches just knitted, K2 * repeat from * to end
And here are two delicate little ribbing patterns that I also use frequently:
Little Ribbing #1
rows 1-3: k2 p2
row 4: k2tog, O, P2
Little Ribbing #2
R1: p2,k3
R2:p2, sl1k2 psso
R3: p2,k1,yo,k1
R4: p2,k3
In my next post, I will give you the pattern for fleeglized Sartjee booties. These were a bit of a challenge, but they were so cute (and had so many seams and ends to weave in) that I just couldn't resist simplifying the pattern.