I love inventing ways to do things--the invention process is often so much more intriguing than actually knitting the object. Once I've worked out the principle, I find myself wishing for an apprentice who could just follow my notes so I don't actually have to knit the darn thing.
Alas, I have no apprentice (applications are being taken now!), so after figuring out how to work this sweet little sweater, I had to produce a finished object, otherwise nobody could figure out what I was babbling about.
What?
In this post, I will demonstrate the principles of sideways seamless construction, which can be applied to all sorts of useful and non-useful things--toys, hats, doorknob covers, whatever. Pithy directions follow all the picture stuff.
Why?
Sideways construction has several things to recommend it.
First of all, most people look, um, not so wonderful in horizontal stripes. But knitting a regulation sweater with vertical stripes is about as fun-filled as, say,sleeping on golf balls. Each stripe requires a different ball of yarn just waiting to tangle up with all the other balls of yarn dangling from the needle. If you forget to twist, you get a hole. Face it, you don't see a lot of striped intarsia sweaters. But knitting a vertically striped sweater sideways requires only that you change yarn color after each stripe. And you can decide on-the-fly just how wide you want the stripes to be.
Second, some types of yarn are inherently droopy--cotton and silk for example. Sideways construction can alleviate the tendency of these fibers to stretch and sag.
Thirdly, you can easily try on the sweater as you go along, as demonstrated by Larry in the accompanying picture essay.
And lastly, it's just fun to do things at a 90-degree angle. All sorts of interesting problems present themselves to be solved with incredible cleverness or brute force, depending on your attitude and and/or Clever Quotient.
So, onwards to the lesson.
How?
Here we have a perfectly normal little sleeve knitted in the round on two circular needles. Anyone who has knitted a tube will know how to do this. (If you don't, the Internet is full of information about this technique.) From this tiny acorn, we shall make a sweater grow.
First, we cast on the stitches for the front and back using my beloved Turkish cast-on. This fancy and exotic name just means: Wrap the yarn around two needles--couldn't be simpler.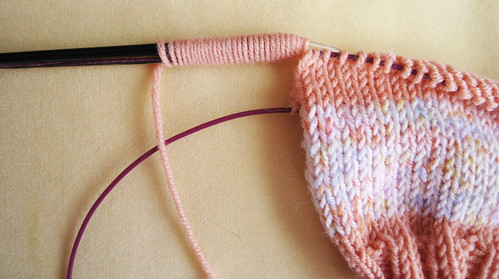
The yarn is at the bottom front of the sweater, so I turn the needles over so the knit (right side) of the garment is facing me and knit back. I am putting a moss stitch band at the bottom edge. Alternatively, you could knit the entire garment plain and pick up the stitches later for a ribbed bottom edge.
You have to be a bit careful here to pick up the correct needle to knit back. If you do it wrong, you'll find you will get up to the sleeve and suddenly, the purl size is facing you. Whoops--better start over.
The sleeve stitches are now shoulder stitches.
As I cruise over the shoulder, a lovely sight greets my eye, namely, all the back stitches just waiting for me to knit up.
And so I do. Now I am at the lower edge of the sweater back.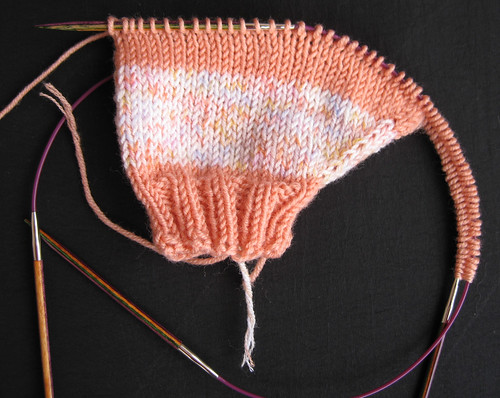
I turn, and purl back to the front again.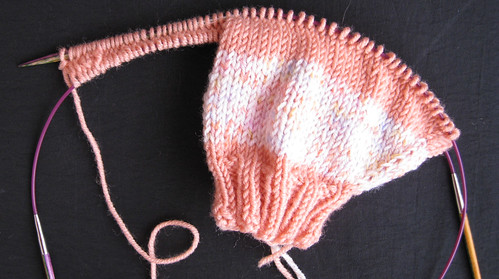
Basically, I am knitting a U-shaped object. The curve is the shoulder and the legs are the front and back sides. Here we are a bit further along.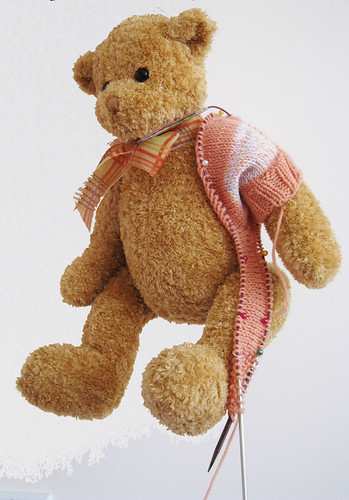
Continuing on, I finish the shoulder area. Here's a side view.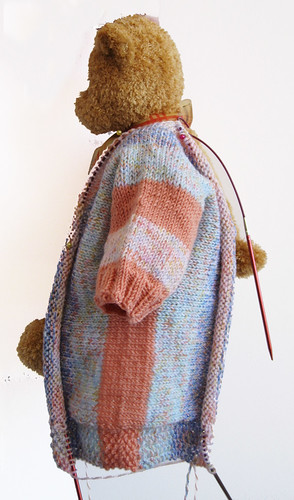
And then, the back and front must part ways for a while, because we do need a hole for the head. If you forget the hole, I suppose you could steek it, but that's way beyond my area of expertise. You are on your own if you decide to cut and sew.
For the neck area, instead of knitting back and forth over the entire garment, we shall knit the front back-and-forth and the back forth-and-back. Um. How about: The front and back are knitted separately to accommodate the neck area. The shapings are the same.
Once we have finished with the neck, the back and front have a joyous reunion at the shoulder.
When the second shoulder area is complete, I carefully isolate the sleeve stitches with markers because I tend to daydream and do stupid stuff like bind off the entire side, thus producing an inventive one-armed sweater. Do not ask me how I know this.
The yarn is at the bottom edge of the front. I turn the garment inside out and do a 3-needle bind-off up to the sleeve stitches.
And whipping out my trusty second circular, I finish off the second sleeve.
And finally, I pick up the neck stitches and do an inch of ribbing.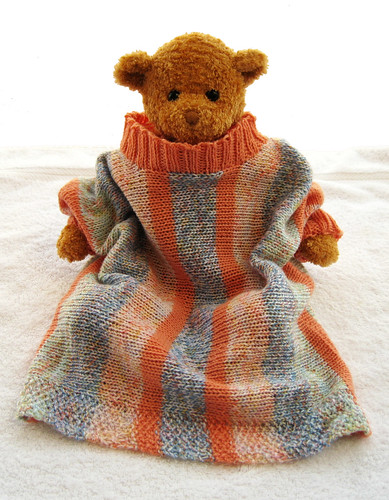
Here is the garment shown flat.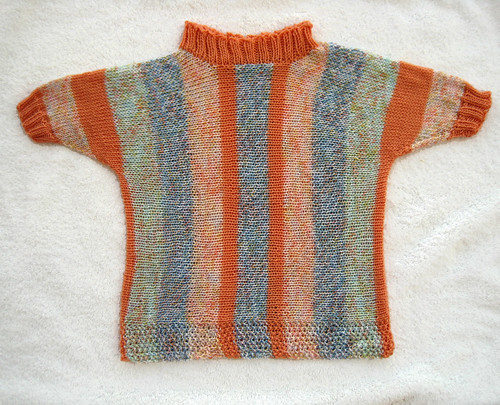
I used four colors of a weird yarn (Stampato Color Baby) that I found in a teeny yarn store somewhere. It's a nice 100% merino fingering weight and the garment needed about 300 yards with size 3 needles (size 2 for the ribbing). I changed colors every 12 rows, but if I were to knit a second sweater, I would use self-striping sock yarn, because weaving in all those ends were way too much trouble for a lazy knitter like me.
Pithy Directions
Using smaller needles, cast on 36 stitches and join in a circle.
Rib for 9 rounds (K2P2).
Knit 1 row.
Increase 4 stitches evenly across the next row. (40 stitches)
Change to larger needles and knit 1 row.
Increase 1 stitch at the beginning and end of every other round 9x. That is, increase 18 stitches. (58 stitches).
Cast on 39 stitches by wrapping the yarn around the needles 39 times. The 9 stitches at the bottom edges in the sample are worked in moss stitch. Alternatively, cast on 30 stitches and when you are finished with the rest of the sweater, pick up 96 stitches across the bottom and knit 9 rows of K2P2 ribbing.
Work 36 rows for the shoulder area.
Split for neck (front and back are worked identically):
Decrease 1 stitch at the neck edge 6x.
Knit 24 rows.
Increase 1 stitch at the neck edge 6x.
Join front and back by knitting without turning at the neck.
Knit 36 rows for the other shoulder.
Place markers for the sleeve--the easiest way is to count 39 stitches from the bottom edges of the front and back.
Turn the garment inside out and do a 3-needle bindoff of the body stitches. Or graft the 39 stitches together, if you like.
Place the 58 sleeve stitches on 2 circulars and decrease 1 stitch each side every other row 9x. (40 stitches)
Knit 1 row.
Decrease 4 stitches evenly across the next row. (36 stitches)
Change to smaller needles and knit 1 row.
Rib for 9 rounds (K2P2).
Pick up 96 stitches around the neck area with the smaller needles and rib for 9 rows.
Bind off really loosely--babys' heads are larger than you think they are.
Thursday, February 28, 2008
A Normality Sweater
Subscribe to:
Post Comments (Atom)

27 comments:
I love it! I might have to make one just to be sure I followed the entire process. This construction would lend itself to a yarn with long color repeats, don't you think?
Apprentice application? I'd love to fill one out. You make such lovely stuff. Do you supply yarn? I can supply the needles and the time. Things might be a bit tight until I get the Sanquhar gloves and Sampler Stole done, but I can squeeze in just about anything.
I'm totally in awe of your ingenuity! So creative and your photo tutorial is wonderful. Thanks for sharing such a clever sweater construction!
You are an Amazing Lady. How do you think of this stuff. I hit my head and think, why didn't someone think of this before. Where do I have to do to apply to be your apprentice? I bow at your feet. Cute sweater for teddy by the way.
clever. I have a sideways knit sweater patternt hat is on my to-do list. This looks really easy. I've kinda been putting it off.
Too cute for words! love the color selection and the short rowing at the top. I have to confess I did not actually read the instructions but that is what it looks like.
What an innovative construction idea. I love that little bear. Too cute!
This is great, I was just looking for a good (easy) baby sweater pattern, this will be perfect!
I Would want to apply to!I know how to read Japaneses chart.
This sweater is interesting, because when I was Googling knitting machine, and I was found myself on eBay. (http://cgi.ebay.com/MACHINE-KNITTING-DESIGNAKNIT-PATTERNS-SHAPE-FILES_W0QQitemZ280205177352QQihZ018QQcategoryZ146375QQtcZphotoQQcmdZViewItem)
So the side way knitting was done back in the day. But i love your idea of doing normality CO its much easier to writ instruction for just half. Rather then writing instruction for the start (at the arm) and then end (at the other arm) Which would required all most two set of instruction.
Neat idea!
*blink. blink*
Wow! That's really cool!!!
(off to find good colors to stripe together, and to manufacture enough time to give this a try...)
That's pretty cool! I've seen a couple of things done in a sort of sideways way, but not many. And after thinking about it, you're certainly right that making it sideways makes striping infinitely easier!
I'm going to have to try that at some point. Not an adult-sized sweater, because heck, I have yet to knit one of those in th standard way! But I have plenty of pregnant coworkers who might like a baby sweater or two...
I love how your sideways sweater is constructed. Totally makes sense.
Very cool. I was hoping for something adult sized, with cables and a henley neckline, but this will do quite fine. :-)
OMG, this is great. Your pictures and words are truly creative as is the whole concept.
That's a really good tutorial. I'll have to try it sometime. Very creative.
OMG thank you so much... I have a sweater in my mind that I really want to make and have swatched for, But I haven't been brave enough to knit it. Your instructions make a lot of sense.
Thank you so much...
I love it when someone takes a kind of boring principle and turns it into something new and cool. Way to go!
Genius, you are! I have never even attempted to make a sweater for many reasons, but your method makes it tempting to try! Nice bear modeling, by the way...
You just amaze me.... with your technical skills, abilities and ideas :o)
I think this is fascinating knitting. What size did you aim for? Have you knit it in different sizes yet? It's amazing how your seem to enjoy solving knitting puzzles. :o)
*Shea quickly raises hand to become Fleegle's apprentice* Pick me! Pick me!
"because I tend to daydream and do stupid stuff like bind off the entire side, thus producing an inventive one-armed sweater. Do not ask me how I know this."
This totally cracked me up!
Lazy knitter? I think not. Anyone who spends that much time and effort with tiny needles making breath-taking lace is not what I would call the definition of lazy!
Love the sweater construction by the way.
We are going to have to do an intense study of your brain since it obviouosly works very differently from mine! Whoa! Awesome construction! That is insanely good!
I love the bear!!!
Really cool way to knit a sweater. If I ever get out from under my pile of sock yarn, I might have to try one .
Great construction and I love the colours came out. It would be really interesting to see how the 'normality' principle works with a lace shawl.
Cute sweater! So what finished dimensions did those "pithy directions" amount to? I'd like to make one for my 2 year old
So. Freaking. Brilliantly. Cool.
Thank you!!
Post a Comment