Warning: This is a long, rambling post!
I enjoy knitting socks, but even the sturdiest socks eventually wear out. Roy's socks always wear through in the same spot--underneath the heel. I've tried reinforcement, but that just delays the inevitable. The sock yarn disappears, leaving a little network of reinforcement yarn. I do own a sock darner, but the results are always a little lumpy. And ugly. And I hate darning socks.
So, when Roy hands me a sad pair of holey handmades, my process goes something like this. I pick up the stitches on the top end and the foot end:
I cut between the needle sets to produce two halves...
...and then ravel the yarn back to the needles:
Snarky Aside: Notice the fresh and brilliant colors on these socks. That's because the Socks That Rock yarn gave out after about twenty wearings and washings. The faded sock you'll see later in this post was worn and washed for seven years before the lovely Fleece Artist yarn needed repair.
After knitting a new gusset and heel, I used Kitchener Stitch (KS) to connect the two halves together. It takes more time to KS than to re-knit the entire midsection, and frankly, Kitchener Stitch is not my favorite thing to do. No matter how careful I am, one or two of 60-odd stitches is always wrong. No, I am not showing you any pictures of that.
So today I started fiddling around with an odd idea. For some time, I have been longing to make the Paton's Cable Yoke sweater. The lovely example shown below was knitted by Tanis of Tanis Fiber Arts (photo used with permission).
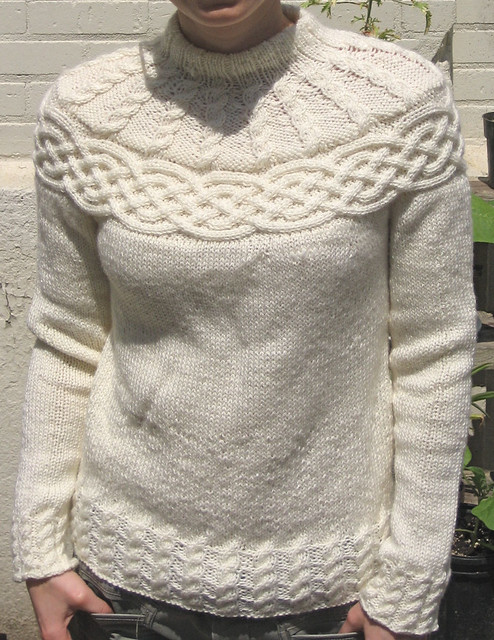
The sweater is constructed by first knitting the strip of cable for the yoke, which is then grafted together to form a circle. The upper and lower parts of the sweater are picked up from the edges of the cable strip.
My thought process then drifted over to the idea of knitted-on lace edgings. For those of you who have never done this, you basically turn your work 90 degrees and cast on for the edging. You knit to the end of the edging, turn, and knit back towards the shawl body. Then you knit the last stitch of the edging together with a stitch on the shawl. Repeat a million times until all the stitches are gone or you have stuffed the thing into the deepest, darkest closet you own, hoping the shawl will dissolve so you don't have to knit any more edging.
So, I thought to myself...what if I started knitting the Paton's sweater from the neck and knit down to the yoke, leaving the live stitches on the needle? Then do a provisional cast-on for the lower body and finish that section. I will have two sets of live stitches that I can join at each edge of the cable strip, which is knitted sideways.
This process would be essentially the same as joining two sock halves with a knitted band instead of Kitchener Stitch.
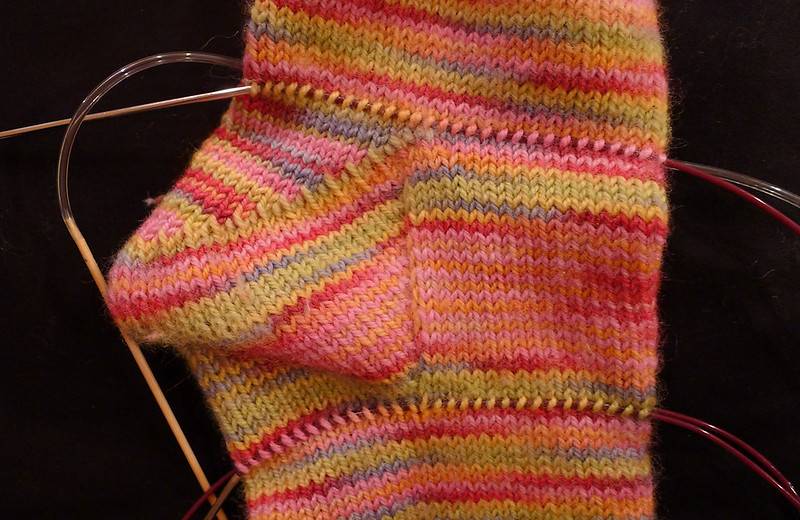
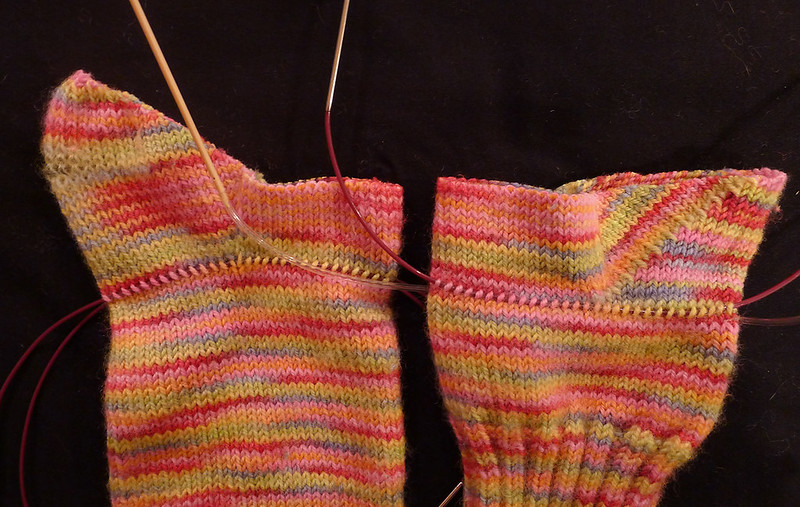
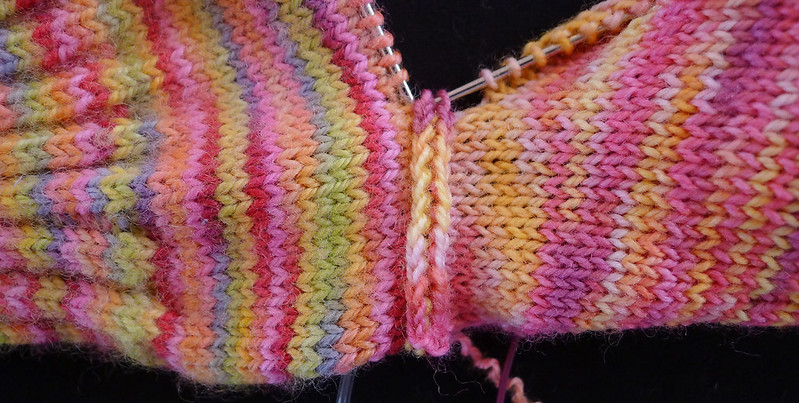
I found an old sock that needed repair to experiment. After I finished the gusset and heel section, I turned it 90 degrees and cast on four stitches using the Knitted Cast On. Because I had to turn the work to the wrong side to cast on, I actually used the Purled Cast On, which consisted of making a purl stitch in the last stitch on the needle, putting the stitch on the needle, then purling in that stitch, and so on. I purled (through the back loops) the final cast-on stitch with one stitch from the upper sock half, which made a tight join.
I turned the work and slipped the first stitch, knit the two stitches in the center of the strip, then knit one stitch of the strip with one stitch of the heel half through the back loops. Continue turning and working, or do as I do and knit backwards to save time and trouble. Always slip the first stitch, which is the decrease from the previous row. And pull that slipped stitch tight to prevent a hole.

When I got to the end, I picked up four stitches from the beginning and Kitchenered them together with the four left on the needle. If I had been picky, I could have done a provisional cast on at the start, but for such a small number of stitches, it wasn't worth the trouble. Fours stitches of KS is a lot better than 60.
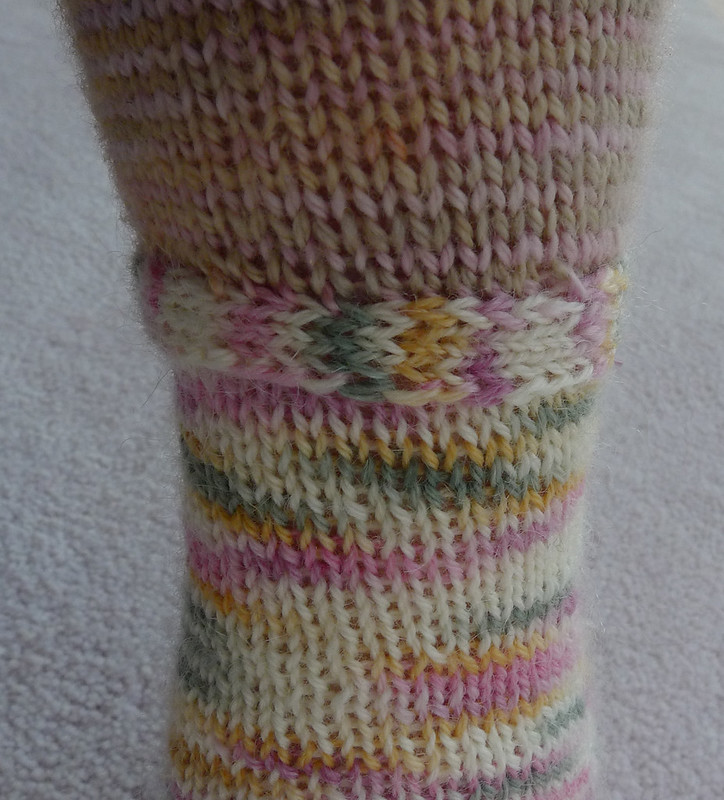
I used four stitches so I could observe the process better, but it seemed to me that the extra two stitches in the center weren't necessary for the sock join.*
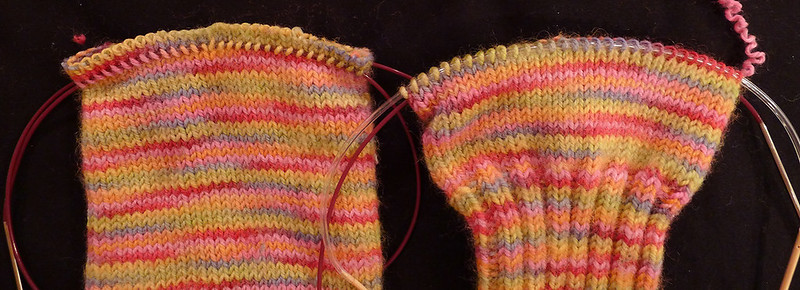
In the next example, I cast two stitches onto the right needle by knitting on backwards, slipped the final stitch to the left needle and knit it together with one stitch from the ribbing half of the sock. Then I slipped that stitch, and knit the next stitch together with one stitch from the heel half. I continued in this way, slipping the first stitch and knitting (or purling) the last stitch of the heel half together with one stitch on the top half. The result is a pretty little braided effect that's smooth on the inside:
I only had to KS two stitches at the end--even better!
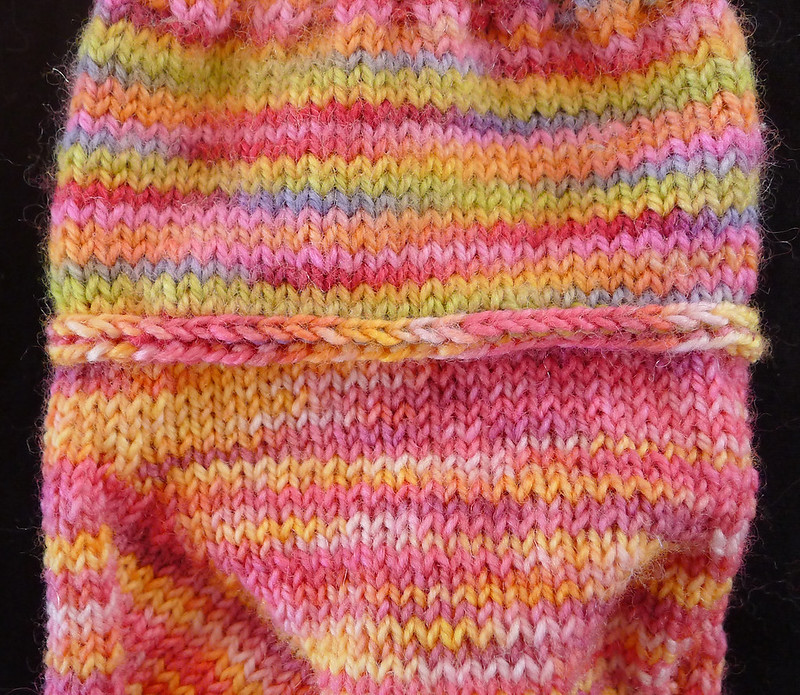
This technique can be used to join any set of live stitches, for example, afghan squares, and will hopefully inspire some interesting designs using pretty insertions. The join can be used to replace the bulky and inflexible three-needle bind-off too. The result is very stretchy, but because it stretches perpendicularly to the joined pieces, you don't have to worry about sagging if you are using a heavy yarn. Finally, the join can be as wide as you like and pretty much any stitch can be used for the join, for example, purls, garter stitch, lace, or fancy braided cables.
* I know. Some of you are wondering why I bothered to reknit the gusset and heel on that sad, washed-out sock. It's because the sock yarn has cashmere in it and these little treasures are indefinably soft and sqooshy. You can see how the color has faded over the last seven years, but now they are ready to go for another seven, just like me! Too bad I can't just unravel my failing bits and re-knit them, sigh.
