I've never been a fan of short rows, mainly because I've never been able to make them look pretty. I've tried all the techniques--yarn overs, Japanese, wrapped, unwrapped, rewrapped, and encroachment-- and frankly, they all look hideous. Or worse, one side looks nice and the other side looks hideous.
Every so often, I pick up my needles and fiddle around with short rows. But it wasn't until yesterday, as I was dozing in the car, that I came up with a new short row technique that actually looks attractive, is symmetrical, leaves no holes, and doesn't require wrapping or safety pins. Those familiar with the fleegle heel will find the concept similar. The only difference is that you are not spacing out the increases to make a gusset. You'll see what I mean when you work the sample (assuming, of course, that you have tried the fleegle heel).
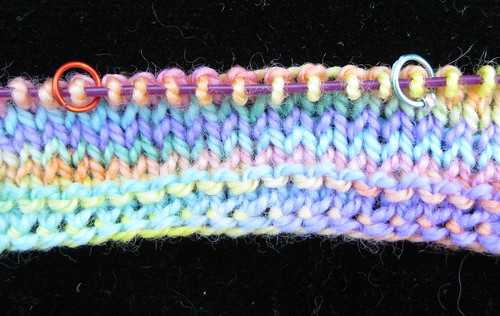
If you want to try this out, I suggest you cast on 20 stitches. Knit a few rows and place markers around the center 10 stitches, because it will be between these two markers that we shall build a little nose. Note that all slipped stitches are slipped purlwise.
Here's what your row looks like at the beginning:
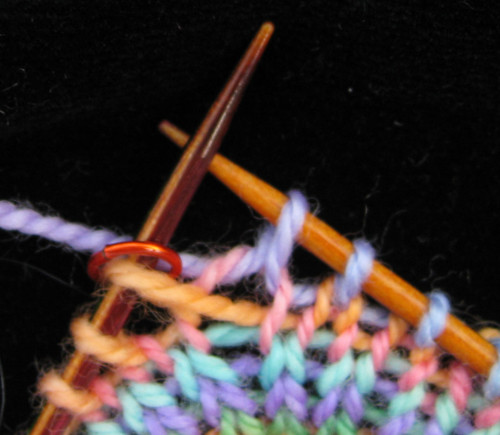
Knit across the 10 stitches between the markers. Put your needle through the bump behind the 11th stitch...

...and knit through the loop. You now have 11 stitches between the markers.
Turn. Slip the first stitch, which is your "new" stitch, and give it a little tug to tighten it up (important!). Before you proceed, please look carefully at the two stitches on the right needle. They are a pair under a single bump and the pair straddles the marker. I call it "1 pair."
Now purl 10.
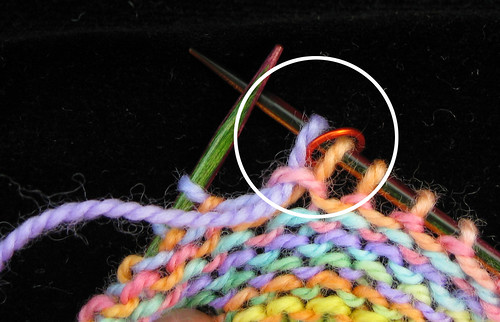
Put your needle through the bump in the front of the 11th stitch...
...and purl through it.
You now have 12 stitches between the markers. Notice that you have made another pair of stitches under a single bump straddling the marker.

Turn, slip then first stitch, give it a little tug to tighten it up, and knit 9.
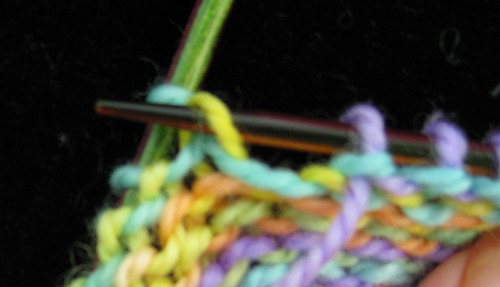
Put your needle through the bump behind the next stitch and knit it. You now have 13 stitches between the markers, and two pairs.

Continue on...
Turn, slip the first stitch, purl 8. Put your needle through the bump below the next stitch and purl it. 14 stitches are now between the markers and 2 pairs.
Turn, slip, knit 7. Pick up the bump in back and knit it (15 stitches between markers and 3 pairs).
Turn, slip the first stitch, purl 6. Pick up the bump in front of the stitch you just purled and purl it (16 stitches between markers and 3 pairs).
Turn, slip, knit 5. Pick up the bump in back and knit it (17stitches between markers and 4 pairs).
Turn, slip the first stitch, purl 4. Pick up the bump in front of the stitch you just purled and purl it (18 stitches between markers and 4 pairs).
Now we are ready for the second half of the short rows. The basic concept is that you will knit (or purl) one stitch further on each side by knitting (or purling) two stitches together. Do pull out the slack when knitting these. Otherwise, you'll have loose stitches that will make you sad.
Here is an annotated photo showing which stitches get knitted together.

Turn, slip the first stitch, knit 5, pull on the yarn to remove slack, knit 2 together.
Turn, slip 1, purl 6, purl 2 together or purl 2 together through back loops. I prefer the way P2tog looks, but you may like P2togtbl better.
Turn, slip the first stitch, pull on the yarn to remove slack, and knit 7. Note that the 7th stitch is the K2tog from the previous row. If you make a note of these decreases, you won't get confused as to how many stitches you should be knitting or purling plain. Knit 2 together.
Turn, slip 1, purl 8, P2tog.
Turn, slip the first stitch, knit 9. K2tog.
Turn, slip 1, purl 10, P2tog.
Turn, slip the first stitch, knit 11. K2tog. Do not turn.
Knit to the end of the row.
Turn. Purl 12 across the center markers, P2tog.
And here's what the left side should look like:
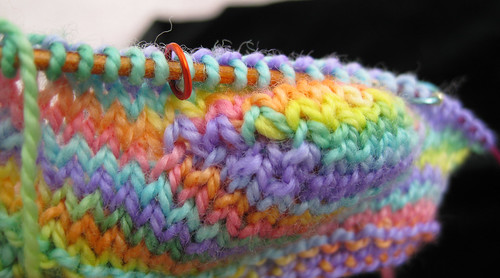
And the right side:
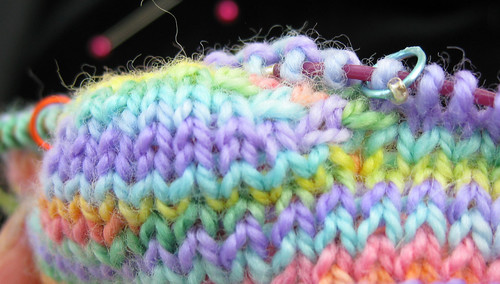
And the front (sorry, it's hard to photograph a nose):

Given this basic technique, many modifications are possible. You can use a different increase (knit front and back, for example). And you can change the directions of your decreases. Experiment and see what works best for you. If you have an improvement, do let me know!

40 comments:
Totally Awesome!!!! Thanks!!!!
Yay! I have struggled with making my short rows look purty. I am excited about trying your technique. Thanks for sharing!
Oh, that's very cool.
Thanks! I have put into a word document and shall use this shortly when coming to the stooopid heels of my socks :)
I look forward to trying this. It looks awesome.
Yes! I'll be coming back to these instructions for my next pair of socks. Thank you.
i just love it when you edjimacate me! :D
Thanks for the tutorial. Tried it and I like the outcome!
That's a great tutorial! I especially like the way that you have shown which stitches get knit together with those little brackets.
You never cease to amaze me!
will you be doing some more/different fibres soon?
OMG! Amazing! I've got to check this out.
And thanks--I know from experience that preparing those photos and writing something that makes sense takes a LOT of time!
I now will condescend to make short-row heels in socks. This is just GREAT. Oh happy happy dance. I really, really hate the way short rows look and this looks much better. And it's easy. And I can remember it. GO YOU!
Brilliant! I am approaching the heel of a sock to try it on.
Wow, this is just amazing!
Wow! This looks a lot better than the usual wrap and turns! Thanks for figuring out all these tricks! You should write a book: "Fleegle's Knitting Techniques"!
Well now! Here's a nother unwrapped short row heel for me to try. I have tried 2 different ones so far and both were satisfactory, but this is my quest. I, too, like the annotated picture with brackets. I will have to search your blog for the Fleegle Heel. I try never to start with the sequel ;]
Trying it tomorrow, my one day off! Thank you for sharing this.
Fantastic! I'm gonna try it for sure. What is that delicious looking yarn you're using?
It's a scrap of sock yarn, but I don't recall where I bought it. It's pretty, isn't it?
Wow! I'm not much of a sock knitter but your short rows look great! Much nicer than what I've done before. Great instructions as usual!
Hmmm, gonna hafta experiment with this technique!
Brilliant!
Looks wonderful!
Why are you knitting a nose? :-)
Love this. Thanks for sharing!
I like it! You're brilliant!
roberta
So, could you please explain how this would apply if I wanted to substitute this in the place of another heel? Let's say I am using magic loop and knitting a 60-stitch toe-up sock pattern that has me starting my heel when I am 2 inches short of the back of the heel. Would I start your heel version at the same place? Also, if I have an average sized heel and instep, would I just place markers on either side of the 10 middle stitches where I am working my heel and then just follow your instructions as presented here?
I apologize if these are obvious questions. I have only knitted 3 pairs of socks, so I am still quite the novice on turning heels.
thank you for your kind comments on my blog!!!
as always your tutorials are excellent! well thought through, and excellent explained!!!
I have bookmarked it for future references
Wow! Thanks for the brilliant tutorial. I found it at the eleventh hour, trying out every short-row toe/heel technique on the internet. :) This one is an immediate favorite.
When closing the gaps, I had lovely results doing ssk on the knit rows and p2tog on the purl rows. This hides the "made" stitch behind the "real" stitch and creates a pretty line on both sides.
Can't wait to try it - I love your 'regular' Fleegle heel.
Wonderful! Better than what I managed to figure out for myself...
I came to your blog and the short row method via a roundabout way. I wish I'd found it sooner! I've always struggled with short rows (and wraps - aaarrgghh), but this method is BRILLIANT! Thank you so much for making my socks look better!
Did you hear me cheering from Canada, right on Georgian Bay, I know you must have heard me cheering from across the bay. Now's the time I break into song.
I made my first Fleegle Sock and the heel is lovely. It's the first sock that I have made myself as the others are going to a programme in my neighbourhood that can use them. The sock fits perfectly. The heel fits snugly, not slipping or sliding. I want to apply the "The Fleegle Symmetrical Short Row--No Wraps, No Holes, No Hassles Heel" to the Fleegle sock.
I did two samplers of the 20 st. heel and it is simple isn't it. The only problem I had and I think that is because my eyes are 1 month and 20 days short of being
76. I did have trouble picking up the bump on the back of the plain st. That was using the fine yarn. The other sample I made was a much heavier yarn. They turned out well.
If I apply this to the Fleegle sock I can't figure out the math.
I thought perhaps I would use 13 centre sts. and fudge a bit with the side stitches but I'm not sure what I'm doing. I have printed out your tutorials, read and re-read them. I know I'm going to go DUH! when you or someone tells me how to do this. Thank you so much for taking me down new paths. I know someone will ask why do you want to do the second heel when the first one fits so nicely. Well, it is just there and I want to see it in a sock. Thank you, thank you, Janet.
I hate to sound un-original, but this is awesome! Incidentally, this is also the best method for doing your Fleegle heel in reverse. (Once I make a sock going one way, I like to do the mate from the other way.)
All sorts of awesome.
What yarn is that in the photos? And why doesn't the no wrap short row heel seem to work with worsted weight yarn??
-jk
Cool, how do I incorporate this into my current sock pattern?
Thanks for sharing!
I would love to do this. I'm fairly new to sock knitting. How do I substitute this in my current pattern?
Thanks for sharing!
Thank you so much for this awesome short row-method! I tried several and yours is the only one I can do without looking it up. And it looks so neat! On both sides. I am using it currently in a sideways knitted leaf-shawlette to form the leaf-border and it is just great!
I will mention you in the pattern of course. I will publish it in July or August on ravelry!
That is so awesome! Thanks a lot for this incredibly amazing short-row method... I prefer the p2tog through back loop :). I am currently using it for a sideways knitted leaf-border shawlette and it is so - wow! Looks nice and neat on both sides and that is what I needed.
Pattern on ravelry, July/August 2013 ;)
I think this looks great , i cant wait to try this. Thanks so much for sharing.
Post a Comment