One of the most intriguing aspects of the Japanese is their endearing ability to make something out of nothing. Well, almost nothing. What other culture could have invented the Corn Flake Sundae (corn flakes, whipped cream, maraschino cherry); karaoke (microphone, tin ear); and the subject of today's post: the
furoshiki (square cloth)?
Furoshiki literally means bath (
furo) spread (
shiki). The term was coined in the Edo period (1615-1868) when public baths became popular. Patrons arrived at the bath house with a change of clothes and other essentials, tidily wrapped in a furoshiki. The cloth was then spread on the floor, giving the bather a personal space on which to change clothes.
More recently, furoshiki have evolved into a package-wrapping art form. The concept and execution are quintessentially Japanese--space-efficient, ecologically sound, totally practical, and exquisitely elegant.
I purchased several instruction manuals on my last trip, and I especially recommend
this one. For some inscrutable reason, the directions are in both Japanese and English, and the wrap jobs are just exquisite.

Although these wrappings look complicated, they are actually easy to do, requiring only the ability to make a square knot. And frankly, a granny knot seems to work just as well, although the ties might not look quite symmetrical.
Today's post will show you how to make two quick knitting bags and the most sought-after container in the galaxy: a watermelon holder. You know you need one. Go ahead, snicker. But the next time you go to the market and wrestle with an awkward, slippery, round, heavy watermelon, you'll remember I Told You So.
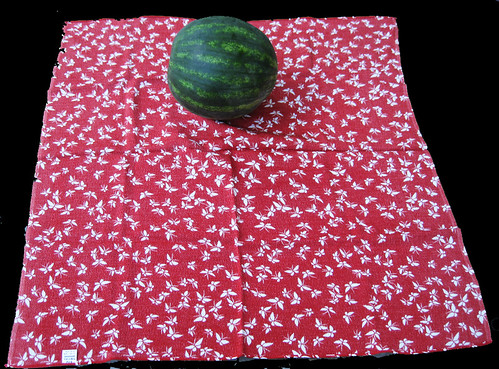
All you need for this lesson is a square cloth. Obviously, the larger the cloth, the more it can hold.
Let's start with the watermelon holder, which, by the way, can actually hold knitting, a bowling ball, or some frolicking chipmunks.
Place your watermelon (or pile of chipmunks) towards the back of the furoshiki.
Tie the two back corners together with a square knot. Notice the hole behind the knot. You will be using this in a minute.

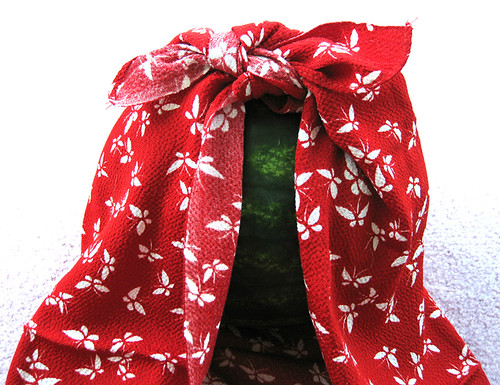
Pull the front two corners through the hole.
Lift them up...

...Twist them...
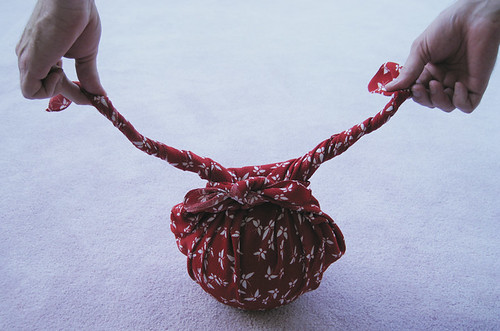
...And tie them together with another square knot.

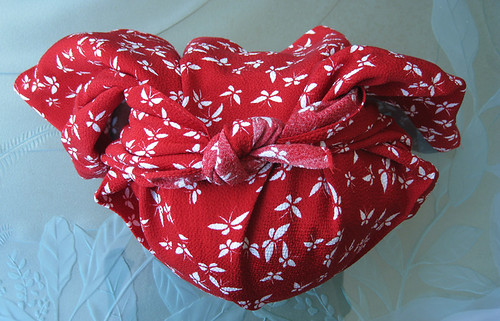
You're done!
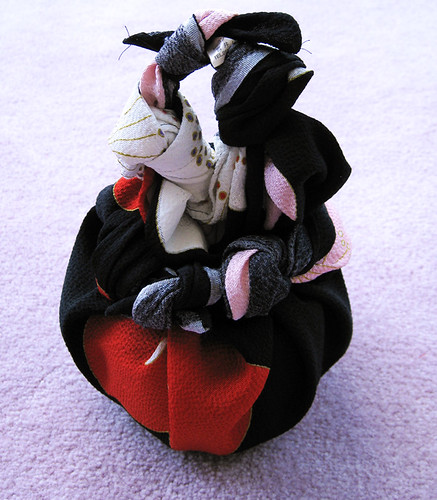
Here's a slightly more complicated bag.
Start by tying an overhand knot in each corner of the furoshiki.
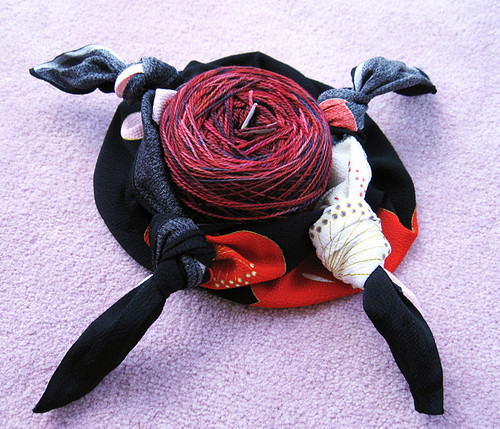
Tie two of the knotted corners together. And then tie the other two knotted corners together.

You're done!
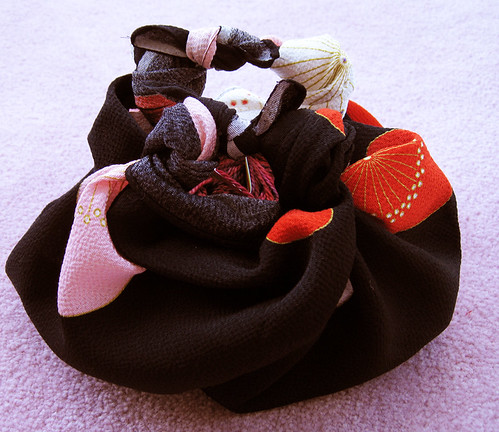
If you want to, you can pass one handle through the other, like this:
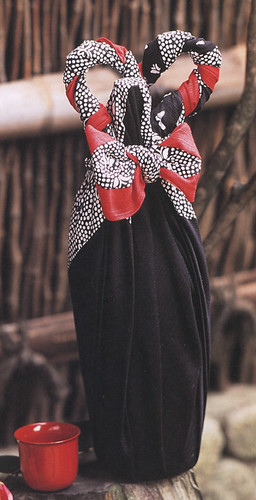
Finally, I'll show you how to make a bag with real handles. In this case, I used a set of plastic circles. You can buy these on eBay or get them from a shop like
SpinBlessing.

Pull two corners front to back through one handle.

Bring the corners around to the front and tie them in a knot.

Do the same with the other two corners.

You're done! Here's what the open bag looks like:
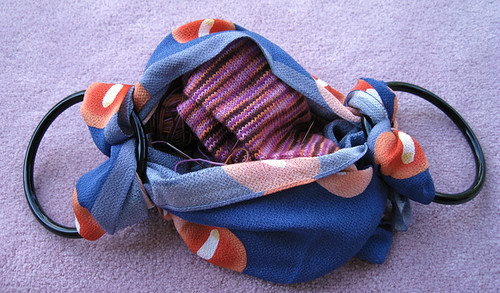
I love these bags for two reasons: first, when not in use, they occupy little space, and second, you can tailor the size of the bag to its contents. And, of course, when people admire your knitting bag, you can tell them you make it in under two minutes.