Alas, I have no apprentice (applications are being taken now!), so after figuring out how to work this sweet little sweater, I had to produce a finished object, otherwise nobody could figure out what I was babbling about.
What?
In this post, I will demonstrate the principles of sideways seamless construction, which can be applied to all sorts of useful and non-useful things--toys, hats, doorknob covers, whatever. Pithy directions follow all the picture stuff.
Why?
Sideways construction has several things to recommend it.
First of all, most people look, um, not so wonderful in horizontal stripes. But knitting a regulation sweater with vertical stripes is about as fun-filled as, say,sleeping on golf balls. Each stripe requires a different ball of yarn just waiting to tangle up with all the other balls of yarn dangling from the needle. If you forget to twist, you get a hole. Face it, you don't see a lot of striped intarsia sweaters. But knitting a vertically striped sweater sideways requires only that you change yarn color after each stripe. And you can decide on-the-fly just how wide you want the stripes to be.
Second, some types of yarn are inherently droopy--cotton and silk for example. Sideways construction can alleviate the tendency of these fibers to stretch and sag.
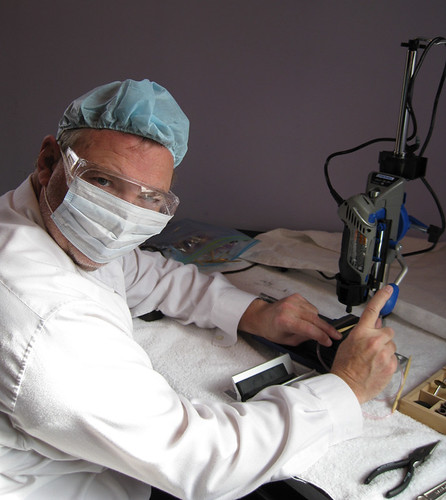
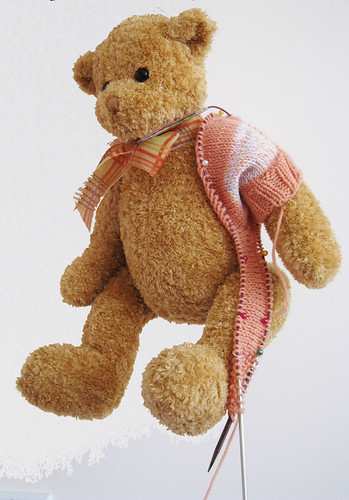
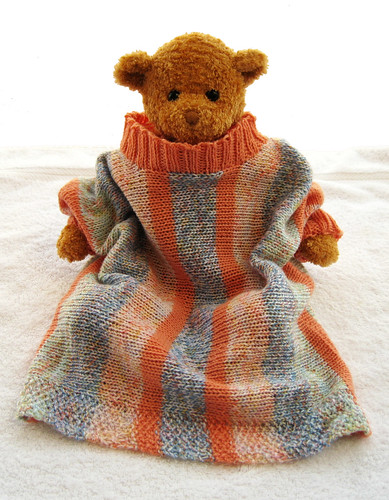
Thirdly, you can easily try on the sweater as you go along, as demonstrated by Larry in the accompanying picture essay.
And lastly, it's just fun to do things at a 90-degree angle. All sorts of interesting problems present themselves to be solved with incredible cleverness or brute force, depending on your attitude and and/or Clever Quotient.
So, onwards to the lesson.
How?
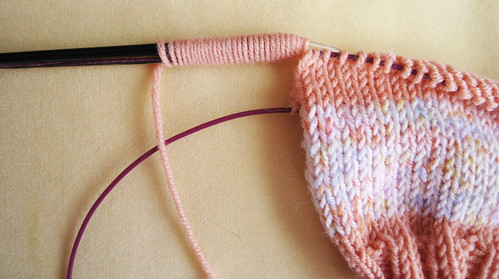
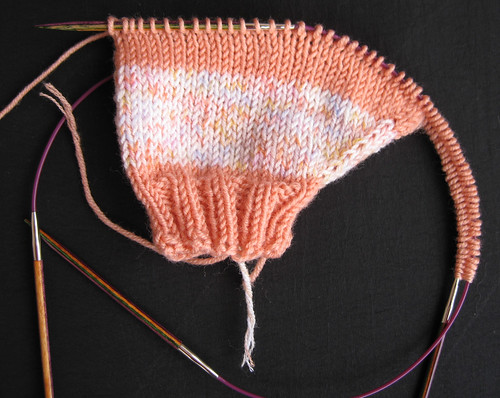
Here we have a perfectly normal little sleeve knitted in the round on two circular needles. Anyone who has knitted a tube will know how to do this. (If you don't, the Internet is full of information about this technique.) From this tiny acorn, we shall make a sweater grow.
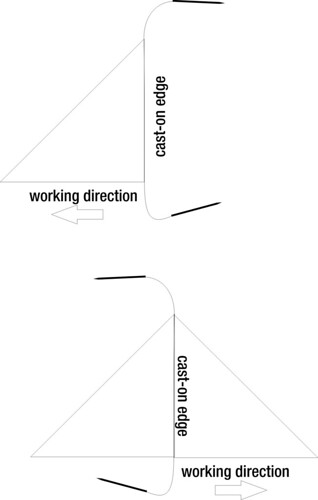
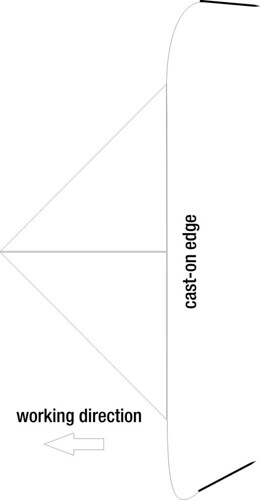
First, we cast on the stitches for the front and back using my beloved Turkish cast-on. This fancy and exotic name just means: Wrap the yarn around two needles--couldn't be simpler.
The yarn is at the bottom front of the sweater, so I turn the needles over so the knit (right side) of the garment is facing me and knit back. I am putting a moss stitch band at the bottom edge. Alternatively, you could knit the entire garment plain and pick up the stitches later for a ribbed bottom edge.
You have to be a bit careful here to pick up the correct needle to knit back. If you do it wrong, you'll find you will get up to the sleeve and suddenly, the purl size is facing you. Whoops--better start over.
The sleeve stitches are now shoulder stitches.
As I cruise over the shoulder, a lovely sight greets my eye, namely, all the back stitches just waiting for me to knit up.
And so I do. Now I am at the lower edge of the sweater back.
I turn, and purl back to the front again.
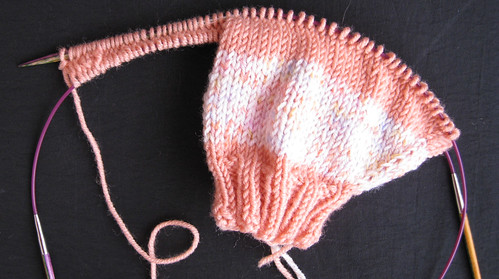
Basically, I am knitting a U-shaped object. The curve is the shoulder and the legs are the front and back sides. Here we are a bit further along.
Continuing on, I finish the shoulder area. Here's a side view.
And then, the back and front must part ways for a while, because we do need a hole for the head. If you forget the hole, I suppose you could steek it, but that's way beyond my area of expertise. You are on your own if you decide to cut and sew.
For the neck area, instead of knitting back and forth over the entire garment, we shall knit the front back-and-forth and the back forth-and-back. Um. How about: The front and back are knitted separately to accommodate the neck area. The shapings are the same.
Once we have finished with the neck, the back and front have a joyous reunion at the shoulder.

When the second shoulder area is complete, I carefully isolate the sleeve stitches with markers because I tend to daydream and do stupid stuff like bind off the entire side, thus producing an inventive one-armed sweater. Do not ask me how I know this.
The yarn is at the bottom edge of the front. I turn the garment inside out and do a 3-needle bind-off up to the sleeve stitches.
And whipping out my trusty second circular, I finish off the second sleeve.
And finally, I pick up the neck stitches and do an inch of ribbing.
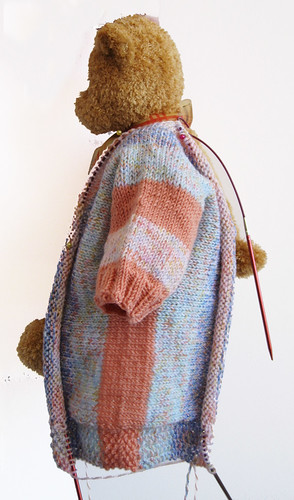
Here is the garment shown flat.
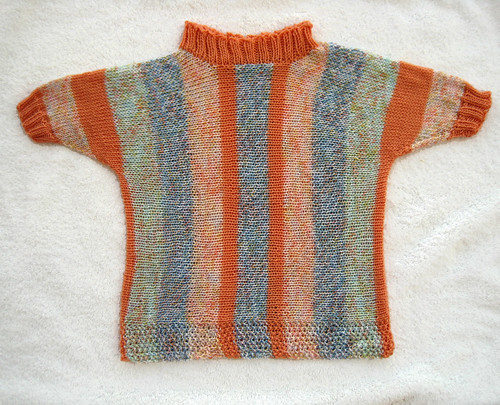
I used four colors of a weird yarn (Stampato Color Baby) that I found in a teeny yarn store somewhere. It's a nice 100% merino fingering weight and the garment needed about 300 yards with size 3 needles (size 2 for the ribbing). I changed colors every 12 rows, but if I were to knit a second sweater, I would use self-striping sock yarn, because weaving in all those ends were way too much trouble for a lazy knitter like me.
Pithy Directions
Using smaller needles, cast on 36 stitches and join in a circle.
Rib for 9 rounds (K2P2).
Knit 1 row.
Increase 4 stitches evenly across the next row. (40 stitches)
Change to larger needles and knit 1 row.
Increase 1 stitch at the beginning and end of every other round 9x. That is, increase 18 stitches. (58 stitches).
Cast on 39 stitches by wrapping the yarn around the needles 39 times. The 9 stitches at the bottom edges in the sample are worked in moss stitch. Alternatively, cast on 30 stitches and when you are finished with the rest of the sweater, pick up 96 stitches across the bottom and knit 9 rows of K2P2 ribbing.
Work 36 rows for the shoulder area.
Split for neck (front and back are worked identically):
Decrease 1 stitch at the neck edge 6x.
Knit 24 rows.
Increase 1 stitch at the neck edge 6x.
Join front and back by knitting without turning at the neck.
Knit 36 rows for the other shoulder.
Place markers for the sleeve--the easiest way is to count 39 stitches from the bottom edges of the front and back.
Turn the garment inside out and do a 3-needle bindoff of the body stitches. Or graft the 39 stitches together, if you like.
Place the 58 sleeve stitches on 2 circulars and decrease 1 stitch each side every other row 9x. (40 stitches)
Knit 1 row.
Decrease 4 stitches evenly across the next row. (36 stitches)
Change to smaller needles and knit 1 row.
Rib for 9 rounds (K2P2).
Pick up 96 stitches around the neck area with the smaller needles and rib for 9 rows.
Bind off really loosely--babys' heads are larger than you think they are.